home tutorials recipes aprons/patterns Soaps

Wednesday, January 27, 2010

Concoctions - Cold and Flu Tea

This last week I have been hit with the worst case of the flu I have had in years. I can tell you it is pretty vile stuff. I wanted to share something that I have used though that has helped speed recovery this and several other illnesses my family has had.
Since my husband lost his job a year ago, insurance has been a luxury we couldn't afford. I realized without it how much I had taken it for granted and how often we had just "run" to the Doctor for colds and flu with the kids. I have had to rely on older remedies to keep my family "healthy" this past year so that we could save the $$ for when we REALLY needed to go to the Dr. I wanted to share some of the things I have picked up that really help.
I have had to come up with a set of "herbal remedies" that make up my families first aid kit. It is where we now turn for help first when we get hurt or feel ill.
I came up with this mixture over time actually and started putting the four ingredients together to help with different ailments. After much research from herbalist friends, on-line resources, and books from the library, this is the first thing that I put in my first aid kit.
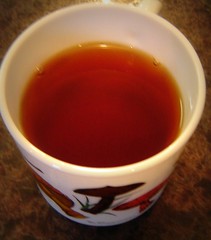


Cold and Flu Tea 1
Cold and Flu Tea
Cold and Flu Tea 3
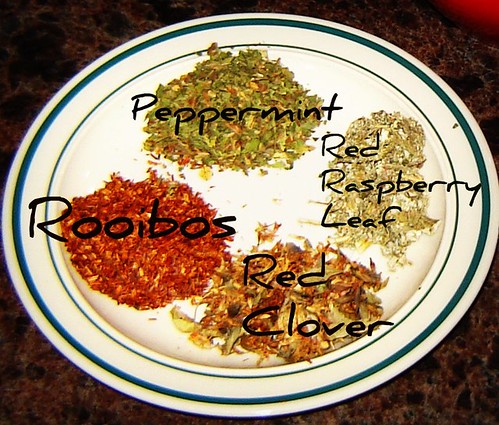
1 part Red Raspberry leaves
1 part Red Clover blossoms
1 part peppermint leaves
1 part rooibos tea

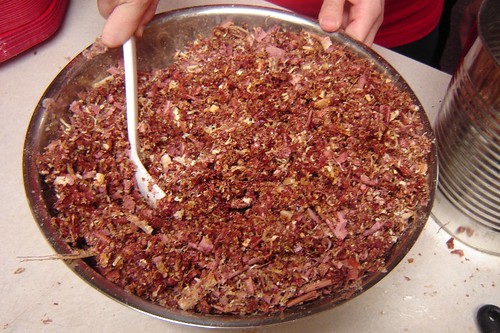
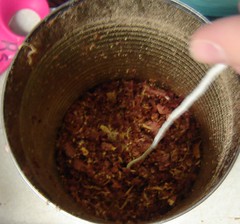
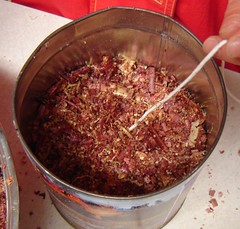
For a pot of tea (about 1 quart) I put in 2 teaspoons each. I usually add an extra teaspoon of peppermint for flavor.

Boil water. Pour over loose leaves in a teapot or jar and steep for 5-15 minutes. Strain. Serve hot or cold, with or without honey. Honey is also very soothing when you are sick and has it's own anti bacterial properties. (don't give honey to a child under 2 years of age, but you knew that already).

This is great for sore throats, caughs, aches, chills, and general feelings of being un-well. I even took this for stomach flu this week and it really helped settle my system and get me back to normal.


Now .... Why these four?? I will tell you.
Red Raspberry leaves are very high in minerals and have anti-viral properties. It is great for women to take because it really works hard for the reproductive system, keeping it healthy, clean, and working properly. I won't do without this herb on the shelf anymore. The anti-viral properties of this herb make it perfect for when you "think" you are getting sick; when you feel that scratchy feeling at the back of your throat but aren't quite sick yet. Tea made from this has prevented more cold for me than I can count. The only draw back is that red raspberry leaves to taste yummy. They aren't nasty by a long shot but kinda like boiled hay. So.... I add other herbs to make it tastier.
Red Clover is a blood purifier. This is great at anytime. (You do need to check with your health care provider though because it has blood thinning properties as well, that is not a problem for me or my family so we use it.) The blood purifying properties help you "clean up" the gunk you have in your system from being sick. This also helps remove toxins from your blood which helps your liver function better.
*** True story*****
When my oldest daughter "Miss Sunshine" was born she cried all the time. I thought she had colic for 8 months. Maybe she did, maybe she didn't but she sure seemed mad a lot. By the time she was 2 she would get so angry she would try to hurt me pretty violently.
Not so Sunny Miss Sunshine
(Seriously same child same day! some 10 years ago. BTW that face on the left was not a sad, tired, or scared face, it was MAD. It actually makes me really sad to see that angry face because there was nothing we could to to help her and it was so upsetting to see her so unhappy. Nothing soothed her. You had to ride out the storm. )
I wasn't so worried about me but she had a 3 year old brother and a baby sister at the time that I needed to protect. I took her to the Dr and he said that she was perfectly normal and just a spunky little girl and I should celebrate that fact. What!?! I was not satisfied with that so I went to a new herbalist in my area that changed my life forever. She did some testing on little " Miss Sunshine" and said that her little liver wasn't processing toxins as well as it should and that the build up in her system was making daily frustrations more than she could bare. She recommended the red clover for her in a tincture form every day. We did that. It wasn't an over night change but within 30 days I saw a different little girl. She was still the spunky little girl we love that could see the funny in everything and bring sunshine to our home BUT the angry bursts were gone. When her "life" would walk by and push her buttons, she could grunt and walk off without reacting. It was wonderful. I also found that when I took the red clover that I could "cope" with "life situations" better. ****
Red Clover also tastes like boiled hay, not yummy but not bitter so I add things to make it taste better.
Peppermint tastes yummy. That was one of the number one reasons for adding it. It also has medicinal properties. It helps sooth the digestive system, calm the body during stress, helps with breathing and many more. Knowing it is good for me is great but since I was little I just loved how it tastes. (being honest).
Rooibos -- What can't this stuff do?! I had a hard time finding anything about it at first and then I found a couple of links here and here that told me all kinds of wonderful information about it. I knew it was tasty but now it is a must have daily drink for me. The reason I add it to the cold and flu recipe is because it is natures sport's drink. It is high in natural minerals and salts and helps return balance to a stressed system. It also helps sooth the system which is great for helping you get to sleep when you don't feel well.

Where do I get these marvelous herbs?? I get some of them from my local health food store BUT mostly I get them from Monetary Bay Herb Company. I have liked the quality I get from them. I can get organic for a reasonable price. They packaging is marvelous too making for easy storage.
I hope this has been helpful for you. I will share some more concoctions and remedies this year and hope they can help bring some health benefits to you and yours.

Please remember that you should not use these remedies in place of seeing a real Health Care specialist in case of serious illness. I am not prescribing anything for you just sharing what I have learned.

Enjoy!

Saturday, January 16, 2010

Sawdust Emergency Candle Tutorial

Hello lovelies! I have another preparedness tutorial to share with you. This is for a long burning light and heat source for times when the power is out. I was thrilled to have this and wanted to share it with all of you. I got this information from my friend Vea. Her blog is all about provident living. It is fabulous!


Emergency Candles


Supplies
Emergency Candles 003 Emergency Candles 004
Sawdust and or wood shavings
Emergency Candles 002
Wax - paraffin or old candle ends

Empty Juice Cans (46 oz)


Proportions

6 cups loose sawdust

12 oz (1 1/2 cups) melted wax

(we actually measured it by 1 1/2 cans of sawdust)

Directions:

Emergency Candles 001
Melt the wax in some kind of double boiler arrangement over boiling water. We used a large pot with a large bowl on top. You DO NOT want the wax melting in something over direct heat of any kind, the chances of a fire are too great.

Emergency Candles 005
Pour over sawdust and mix well.
When it is cool enough to touch you can mix it with your hands.

Emergency Candles 006 Emergency Candles 007
Pack the wax/sawdust mixture tightly into the can within 1 inch from the top. You really want to pack it down hard and tight. The instructions called for a wick for lighting the candle. We packed in around it all the way to the top of the candle. Trim the wick.
(Idea here...... The wick is only used for the first lighting and I am not sure it is even needed there. For the next one I make I am going to stick a birthday candle in the top layer of the candle so that maybe 1/2 inch of it is sticking out for lighting.)

To burn the candle


***********SAFETY SAFETY SAFETY************
Keep out of reach of small children.
Have the candle on a flat, secure surface.
Protect surface with an trivet or pan to keep from melting your counter top.
Keep a lid or tin close by for extinguishing the candle. DO NOT BLOW IT OUT! You will at least singe your face and hair if not start a fire!
Emergency Candles 017
Light the wick and step back and watch it take off. (you might want to test your first burning outside, away from the house.)
Emergency Candles 019
Enjoy the large amounts of heat produced.
You put the candle out by putting a metal lid or something flat over the top for a few seconds. Warning it will smoke a lot when you put it out so you might want to remove it outside quickly.
Emergency Candles 021
For the next burning you just drop a lit match on the surface and it takes off. (I really think you could do that to start with but just for the sake of following rules, I included the wick.)
You may have noticed the holes punched in mine. Those are not necessary for a heat candle. I added those because I was told you can cook on one of these. Problem.... The wholes are for air, flame or something and when I put the pan of water on top of this, the flame went out within seconds. Not cool. So I will be looking for ideas to make this work. The selling point on the candle for me was that I could cook on it in an emergency and I plan on doing that so I will be experimenting until I come up with a way to make that work. :o) Then I will share the info with you.
A candle this size should heat a 9x12 foot room and keep it from freezing for about 10 hours. I have not tested this yet though. That is what I gathered from people who had made them.
I really want to make a smaller version of this and use it to cook food or heat water for our 72-hour kits. This is something my older children should be able to use themselves during an emergency situation.

Saturday, January 09, 2010

Miss Reynold's Always Fail Brownies

This recipe has been staring me in the face for 20 years now. Miss Reynold's was one of my favorite high school teachers and became a very dear friend. She made the brownies for one of our Student Council meetings once and I begged for the recipe. I slipped it into my small recipe collection at the time and always vowed that one day I would make them. Well I finally did.

They were everything I remembered them to be and since I made them with my children on a particularly cold snow day this week, it was even more fun and special.
Miss Reynold's was my freshman English teacher and later my Student Council sponsor. She introduced me to Anne of Green Gables and completely changed my life. Thank you Miss Reynolds. ☺
Always Fail Brownies
Sorry there are no step by step pictures but you were lucky there was one left to take a photo of. These were gone pretty fast!
Miss Reynold's Always Fail Brownies
1 box German Chocolate Cake Mix
1 cup chopped nuts
1/3 cup evaporated milk (or regular milk if that is all you have)
3/4 cup butter
1 (14 oz) package Caramels (about 50 of them) (*or make your own when you get everything in the pan and discover someone ate the caramels without tellin' you!)
1/3 cup Evaporated milk (again whole milk works)
1 cup chocolate chips
Melt caramels and 1/3 cup milk. Keep warm.
Combine cake mix, butter, nuts, and 1/3 cup milk.
Press half of this into the bottom of a greased 9"x13" pan.
Bake at 350 deg F for 6 minutes.
Remove pan from oven and sprinkle chocolate chips all over.
Next pour the hot caramel over all.
Crumble the remaining batter over the caramel.
Return to oven and bake for 16 minutes.
Cool well before cutting. (This is the hardest part! We had to put ours in the freezer to speed the process up.)
** We got to the melt caramel part (after we had the cake part ready) and discovered that SOMEONE!! had eaten the caramels I THOUGHT were in the pantry. We were NOT going to be cheated out of our "Miss Reynold's Never Fail Brownies". So...... we made our own batch of caramel from scratch. Yes we are that crazy. So here is my mom's caramels recipe and it is TO DIE FOR! I used half the recipe in the brownies and poured the rest into a 9" cake pan and saved them for later.
Mom's Like See's Caramels
That Won't Stick To Your Teeth
3 cups white sugar
3 cups cream (or evaporated milk)
1 1/3 cup white corn syrup
1 cup butter
16 level Tbsp flour
1 tsp vanilla
Combine sugar, syrup and 1 1/2 cups cream. Bring to a boil Add the remaining cream very slowly, so it doesn't stop boiling. Cook to the soft ball stage. (this will take a long time).
Combine the melted butter and the flour, 1 Tbsp at a time, add to the boiling mixture, stirring constantly until it forms a hard ball when tested in cold water.
(Hardness of the ball is determined by how hard you want the caramels to be.)
Add the vanilla and nuts if desired. Pour in a buttered pan.
(An 8" square pan makes candy about 1 1/2" thick. A 9 x 13" pan might be better.)
When cool, cut into squares.
(My mom and I like this recipe with a pinch or two of salt. Candy without salt has a flat taste. The salt compliments the flavor of the butter and cream. Give it a try!)

Sunday, January 03, 2010

Wood Stove Cleaning Tip

My wood stove and my mother's wood stove both have glass windows. I love them because you can see the bright fire burning in them and it makes it that much more warm and toasty. However, it doesn't take them long to get dark from creosote (the black stuff from burning wood). My children and I have tried several different cleaning products and devises with minimal luck.
fire starter tute 017
Well the other day, as I was kneeling down to scrub the window again, I could hear my dad in the back of my head say "dirt cleans dirt kid." So I gave it a try.

Here is what I did.

fire starter tute 018
I took an old wash cloth and got it wet.

fire starter tute 019
Then I dipped the wash cloth in some old ashes from the stove.

fire starter tute 020
Then I scrubbed the window with the wet ashes and cloth.

fire starter tute 021
Then I rinsed out the wash cloth and wiped the window clean.
It was that simple and in less than a minute I had a shinny clean window. We were again able to enjoy a bright fire.

fire starter tute 022

Friday, January 01, 2010

Fire Starter Tutorial

Happy New Year! My pretties!

I wanted to share a quick money saving tute with you to start the year off right. 2009 was a lean year for us. DH lost his job in January and had a hard time getting into his new job. It made for a very tight year. Things are a bit better but still very tight. I know that many of my readers have gone through or are going through the same situation. Well I have picked up a few little tips over the years to help make do and thought I would start a "Frugal Tutorials" spot here on the blog where I can share them with you.

My house has been heated with only electricity for most of our married life. Christmas 2008 we were able to put in a wood stove (used, but new to us and in great shape). Well it has really saved on our electric bills. We do live on a heavily wooded farm and have lots of wood to clean up from ice storms and tornadoes here so we have a free supply of wood. Just lets say that the wood stove has nearly cut my winter electric bill in half and that is a good thing.

I am a very lucky girl and had a great dad that made sure I knew how to build a good fire. It was kinda a pride thing. I was always tickled when I could build a fire in the wood stove as well as he could in the same amount of time. I love getting a wood fire started and trying to do the whole thing with just one match (another pride thing). Well some mornings I just don't have time for that and need to get the house warmed up quick for the kids. I remembered an old cub scout trick of making your own fire starter from things found in the house. It also saves some items from the landfill.

So..... here is my money and time saving tute for you.


fire starter tute 011
Quick Fire Starters

Supplies

fire starter tute 002

Dryer lint

Paper egg cartons (NOT the foam kind)

old candles


Instructions.

fire starter tute 004
1. Pack the cups of the egg carton with the lint.

fire starter tute 003 fire starter tute 005
2. Place the old candles in the top of a double boiler (can be made from a metal bowel over a pan of boiling water.) Melt the candles over a water bath.


fire starter tute 006 fire starter tute 007
3. Pour the melted wax over the lint filled egg carton. I pour once let it set for a few seconds and pour again to make sure I really filled them and let the lint soak up the wax. Set them aside to cool completely.


fire starter tute 012
4. You're done! You have a dozen (or more) quick little fire starters and you made them all from things you had around your house that were ready to be thrown in the trash.


How to Use Them


fire starter tute 013
1. Place a fire starter in the middle of your wood stove.


fire starter tute 015
2. Put your small kindling around it. (I use refuse lumber from construction projects and take a few mintues to cup them up with my hatchet into little pieces. ) Then place small pieces of wood around that. Place the wood in a Teepee, that is one of the easiest fire starting shapes.


fire starter tute 016
3. Light our starter and shut the door and watch. Your fire should take off quickly and burn well. The wax give you a nice little flame long enough to start the bigger wood on fire.


fire starter tute 024
Here is my little fire after about 20 minutes.

Warm, toasty, and cheery.


These little starters are great to have in your preparedness equipment too incase you have ice storms and have too cook over a fire to feed your family for over a week. :o)

Enjoy!

Thursday, December 17, 2009

Crab Salad

Confession: I post recipes here because I lose things and there are some recipes that I am lost without. This is one of them. I have spent days looking for this recipe so I could take it to my Quilt Guild's Christmas Party tonight and FINALLY found it. So..... I am posting this recipe here so I will be able to find it next time I want it AND because it is so fabulous I want to share it with my readers too.

Jill's Crab Salad
I got this from my daughter's best friend's mom. She has lost an amazing amount of weight in the past few years and when I asked her what her secret was, she said it was a handful of recipes that she loved, that were good for her, and safe to eat (meaning you aren't going to hurt any diet by eating them). They also have a good balance of fats and proteins which fill you up and leave you feeling satisfied. Combined with smart carbs, you have a great meal.

So..... Here is the fabulous crab salad recipe.

Jill's Crab Salad

1 cup imitation crab meat chunked
1/2 cup chopped celery
1/4 cup green onion, chopped
1/4 cup green pepper, chopped
1 cup cottage cheese
vinegar (a dash to taste)
Salt & Pepper to taste

Mix together and enjoy.
This is great with veggies, crackers, and a slice of fresh bread and a cup of V8 juice.

Tuesday, December 01, 2009

Puppy Pouches

I wanted to share a fabulous Etsy Find with you!!
Bottom Zipper a
I am afraid he is my favorite. I know you shouldn't have them, But I do. I wouldn't mind if this puppy followed me home!
Blue a
Here is another that isn't in the shop yet.
How do I have access to such a photo you ask?
Well the Etsy Shop owner just so happens to be my fabulous Big Brother Sam.
He has wicked sweet leather working skill and an incredible talent for creating these fabulous bags/pouches. I am sure his wife might have something to do with the creative design though.
They were married in Japan and lived there for 10 years before moving onto the farm here next door to me and my little family. It has been great for the last few years to have cousins right next door. His sons helped my poor lonely boy have instant brothers before his own brother was born. My girls have been there to balance out life for his one daughter.
One last treat for you.
Kitty 1 a
Now head on over to Sam's Etsy Shop "Sam Hill" and send some etsy love.
How do you send Etsy love you ask?
You go to Etsy and log in or sign up if you haven't already, and then check out his shop and favorite it with a little red heart. Better yet, you actually buy one of his pouches.
Hey I will go one more, if you buy one of his pouches and tell him that Lucy sent you, I will include a bar of my fabulous soap with the pouch for free! You can't beat that.
Now run over there before my big sisters swoop down and snatch them up. You have a running start because some of them are techno challenged and can't even log into Etsy yet. hee hee but I didn't tell you that. HA!

Tuesday, November 24, 2009

Thanks Givings Past

I was digging though some old treasures this week and stumbled on an old book of my mothers that was printed in 1905. It is "The Economical Cook Book" by Mrs Sara T. Paul. Click on the link and you can see the whole book yourself. You can see it here too. You can buy it here.

Book
I love this description of the book!
Kitchen
This is an illustration from the book of the "Ideal" Kitchen. I love it!
In case you can't read it, here is what is says.
"The two views show a model kitchen arranged for convenience, for health, and economy. The floor covered with oil cloth for tiles, the walls papered or painted, plumbling easily accessible, pantries and cupboards ample -- range of the latest pattern, and sinks with hot and cold water."
In looking through this treasure of a book, I found this recipe for Roast Turkey and thought I would share it with you. It is interesting to see how things have changed, and how they haven't in the last 100+ years.

Turkey
Roast Turkey
"Singe the turkey with burning paper, pick out all the pinfeathers, wash it clean and wipe it dry; then draw out the entrails, and wash the inside of the bird with several waters; prepare a filling as follows: bread-crumbs sufficient to fill it loosely (it should never be packed in any kind of poultry or birds), season with half a teaspoon of sweet basil, one of sweet marjoram, and onion chopped very fine and stewed for five minutes in a quarter pound of butter, which pour over; pepper and salt, and if convenient two dozen oysters chopped fine, fill the bird with this, reserving a little to put in where the craw came from, put the ends of the legs through the opening you made when you drew it, letting the joint come just through the vent, turn the wings back and run a skewer across through them, securing it with a string, skewer the legs in the same way, season the outside of the turkey with pepper and salt, dust with flour, and place in a dripping-pan, pour round it a cup of water. If the turkey is a very large one it will require three hours, one of ten pounds will roast in two hours, and a small one in an hour and a half; baste it frequently. For the gravey, when you first draw the turkey, put the liver, gizzard, end of the wings, and place the neck, and the heart into a stew-pan, with half a large onion cut in two, pepper and salt, cover with cold water and simmer for several hours; when perfectly tender, take out he liver and gizzard, chop the latter and put it back, rub the liver to a smooth paste with the yolk of a hard boiled egg and a piece of butter as large as a walnut, moisten with some of the broth, add a heaping tablespoon of flour, stir this into the sauce-pan, boil up once, when you dish the turkey, pour the contents of the sauce-pan into the dripping-pan, stir it round until brown, pour a few spoonful over the turkey after you have removed the skewers and strings, and serve the rest in a gravy-boat."
Isn't that wonderful!! This is how my grandmother cooked and I would hear directions like this from my mother as I grew up. I love it when recipes aren't bound by measurements and lists of detailed instructions.
This book was found in the attic of the cabin where my parents lived when they were a young married couple. My mom thinks it belonged to her mother-in-law or more than likely my dad's maternal grandmother . We will never know! It is a treasure though and I think I will see how much of this I can try this year.
I would like to take a minute to tell you my peeps that I am thankful for you and your comments and the friendships that have sprung up for me here through this wonderful medium of blogging. I hope each of you has a wonderful week and if you are celebrating Thanks Giving, I hope you have a lovely time with family and friends, remembering the many things you have to be thankful for.
Love, Mama Byrd

Wednesday, November 18, 2009

Baked French Toast

French Toast 001

My dear friend Suzanne fixed this for our Quilt Guild Retreat this past month. It was Fabulous! I use that word a lot but it really was.
My children love French toast and so do I. I may post how they make that but here is how we adapted Suzanne's recipe and made it our own.

4-6 sliced of whole wheat bread cubed or torn in chunks
1 pkg 8 oz cream cheese (optional)
6 eggs
1 cup milk
sprinkle of cinnamon and/or nutmeg
pinch of salt
brown sugar or Sucanat

Butter a 9"x9" baking dish
Place half the cubed bread in the dish.
Cut the cream cheese over the bread.
Cover with remaining bread cubes.
Mix eggs, milk, salt, and cinnamon or nutmeg together in a blender.
Pour over bread.
Sprinkle the top of the bread mixture with Sucanat or brown sugar.
Cover with plastic wrap or foil and refrigerate overnight.
In he morning, preheat the oven to 350 deg F.
Bake for 45 - 60 minutes.
Serve warm with maple syrup, powdered sugar or just the way it is.

Sunday, November 15, 2009

Scented Play Dough Tutorial

Play dough was one of my favorite things to play with when I was a little girl and I love making it for my children now. I love how home made dough feels. It is so smooth and has the right texture. I loved helping her make it over the stove and then helping her kneed in the color when it was done. I loved the feel of warm fresh play dough. It was so wonderfully soothing.
As a little kid, I had to attend many meetings and some night classes with my mom. She would pack a baggy of play dough and I knew that I was in for a treat for hours. I loved making sculptures and had all kinds of stories running in my head as I sat on the floor next to her or at the back of the room with a chair seat as the stage for my pretend play.

Well here is the recipe I use now for my kids. I switched over to scented dough several years ago. The one thing I hate about play dough is what it smelled like after a couple of kids had played with it. Now the dough has a nice fruity scent.
I bet you could also use essential oils and have herbal scented play dough. I might have to try that with lavender. Hmmmm.... Any way this is the recipe that always works for me.


Play Dough 001

Scented Play Dough
2 1/2 cups flour
1/2 cup salt
2 pkg fruit flavored drink mix (without the sugar)
1 Tbsp Alum
3 Tbsp oil
1/2 cup flour
2 cups boiling water

Directions:

Play Dough 006
Add flour, salt, flavoring, alum, and oil into a large mixing bowl.


Play Dough 007 Play Dough 008
Add the boiling water ....


Play Dough 013


.... and stir.
Play Dough 014
Add the remaining 1/2 cup of flour if needed ....

Play Dough 017
..... and kneed by hand .....
Play Dough 020

..... until smooth, soft and definitely not sticky.
Play Dough 021
Now Play!

Related Posts Plugin for WordPress, Blogger...