home tutorials recipes aprons/patterns Soaps

Wednesday, April 30, 2008

The Winner Is

Ok so I waited till morning. I was just too tired. :o)
I numbered everyone and put the numbers in a number generator and it picked number 32 and that is .....


mattie said...
Happy Birthday! Such a cute apron...

So I will contact Mattie and get the shipping details from her.

For the rest of you, I am sorry I couldn't give an apron to each and every one of you. Your sweet comments made for an extra special birthday treat each time I sat down to the computer.

THANK YOU!

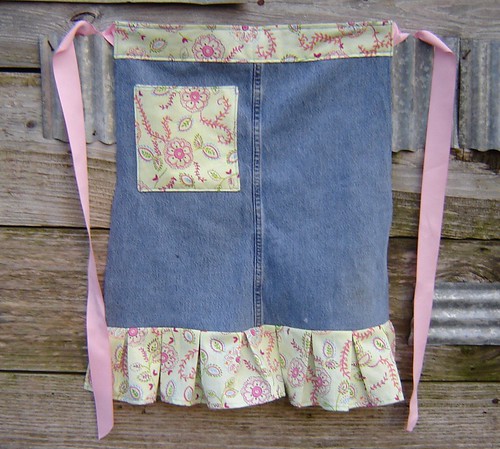
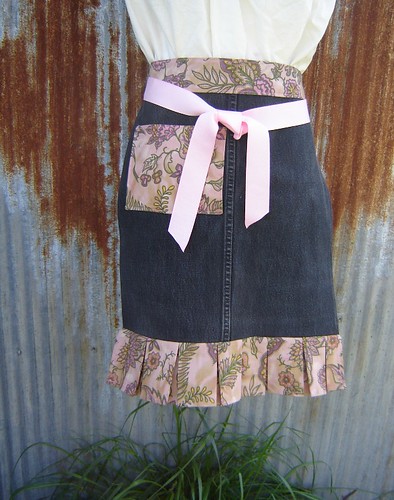
I do have two extra aprons left though. ( I couldn't help myself). They were so fun to make and I had such fun fabric in my stash. I had a lovely pair of black jeans (my favorite pair in fact) that were screaming to be made. So I did two more in black and pink. I am putting them in my Sexy Apron Day Etsy shop. If you want one made by the master (hee hee) you can snatch them up today.
Flowers 2
Polka Dots 2

Tuesday, April 29, 2008

Birthday Giveaway!

OK, I promised that I would post this. It is my birthday today. I am now 3 times as old as my oldest child. To celebrate I am giving away one of my new Jeans aprons. I stayed up late last night making one but didn't get a picture taken yet. I will get that as soon as I can today. It is FREEZING outside so it may be a little bit before the pictures get loaded.
So, until I get that done I wanted to make sure you had the opportunity to post and get in on the drawing. What you have to do is leave a comment on this post and I will pick one of you at midnight tonight and post the winner. If your profile is one that won't let me e-mail you directly then you are going to have to come back here tomorrow morning and find out who won. If I can't contact that winner with-in a day, I will pick another one. :o)

Finally got a minute!
Birthday 3
I used my one and only Amy Butler piece of fabric. I love the little bit of blue in it.

Here is the pocket detail.
Birthday 2

Saturday, April 26, 2008

Jeans Half Apron Tutorial

Tute 15
I couldn't help myself. I had to make another apron tutorial. I vowed I wouldn't do anymore after last year but I miss them! I love creating aprons. I can't take all the credit for this. I got the idea from my niece Angelic's Spring Sassy Apron. It was just so sweet and simple. I had to make one and I thought you might like making one too.

Supplies:
an old pair of jeans (actually just one leg)
Scraps of fabric
1 1/2 to 2" Ribbon (optional)

The instructions - (I won't be giving exact measurements because I didn't really make them and you can tailor this to fit what you have on hand.)

Tute 1
1. Cut the leg off an old pair of jeans and cut the inside leg seam open. Lay the leg out flat.
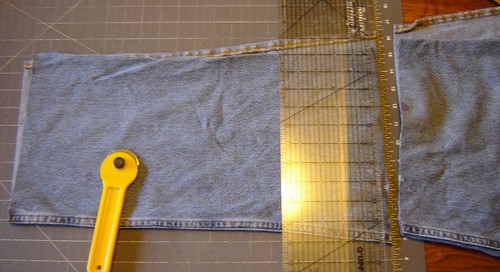
Tute 22. Fold the fabric in half and trim off the leg hem. I measured down 18 inches and made a straight cut. This is easily done with rotary cutting tools.
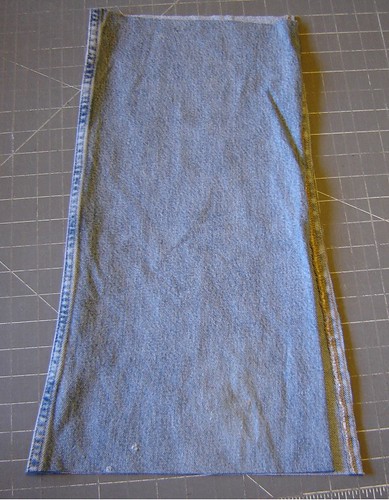
Tute 3
3. You will notice that one side of the pant leg is wider than the other. Trim them up so they are even.

Tute 4This is what it should look like now.

Tute 6
4. Fold the sides under and top stitch to finish the edge.
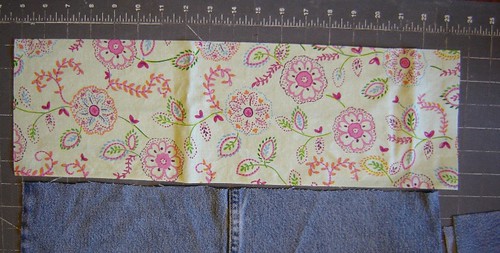
Tute 55. Cut a piece of fabric the width of the top of your apron plus about 2 inches or so. I cut mine about 6 inches wide. This will be your waist band.

Tute 7
6. Take your waist band piece and fold it in half lengthwise and press. Then fold each of the long sides in about 1/2" to 3/4" and press. Sandwich the apron top inside of this band now. Take the ends and fold them over the apron top and then fold the band piece down. I know that sounds confusing but I hope the picture shows this.

Tute 8
7. Cut two pieces of wide ribbon for the ties (about 32" long each) and sandwich them into the layers of your waist band. Top stitch all the way around the band to secure everything.

Tute 9
8. For the quick pleat ruffle, fold the apron bottom in half. Fold it in half again. Fold it in half one more time. :o) Yes three times. Now press it really hard with your iron.
I cut out a ruffle piece that was about 5 inches wide by the width of my fabric. (that was the size scrap I had so I used it.) Hem one long side of it and the two short ends by folding under and stitching. Fold this ruffle in half three times like you did the apron bottom. Press it very well with a hot iron.

Tute 10
9. When you unfold the apron bottom, quickly pin where the creases are or they will disappear quickly.

Tute 11
10. Unfold the ruffle piece and pin it to the bottom of the apron matching up the crease lines.
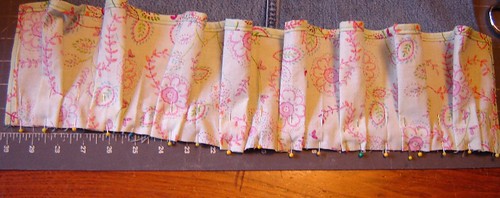
Tute 12
11. Eyeball the pleats now which ever direction you want them to lay. Have fun. I made box pleats.
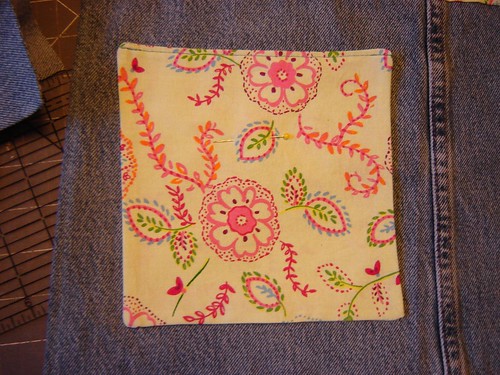
Tute 1312. I almost forgot the pocket. I cut out two 7" squares from my fabric scraps. I sewed around the edges leaving a hole to turn the pocket. I top stitched across the top of the apron and the pinned it in place where I wanted it and stitched it in place. I like my pocket on the right side because I am right handed. I think the pocket looks better on the left for some reason but works better on the right for right handed people.

Tute 14
13. To finish off your ties, cut the ribbon at a 45 deg. angle. You must seal the edge or it will ravel really bad. You can do this by running it quickly over a flame from a lighter or a match. I just couldn't take a picture and demo it. :o)

Now you are done!
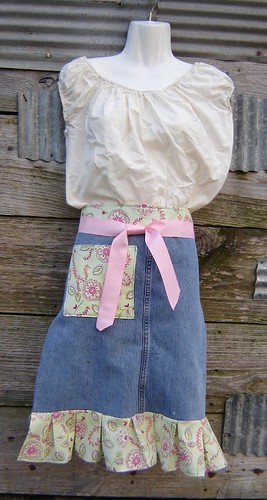
Tute 16
Tute 17
Tute 18
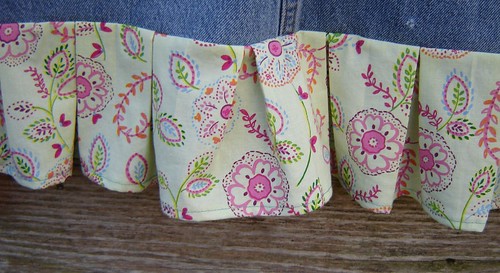
Ruffle detail.

Ok Now that you made it all the way to the end, I have a treat for you. I just love this apron. I would like to share one with one of my many bloggies. So in honor of my Birthday on Tuesday, I am going to make another one of the puppies and offer it to one of my bloggies. What I will do is post a picture of it on Tuesday morning and I will watch all the posts that day. At midnight, I will put all your names in a pot and pick a lucky winner that I will ship my apron off to to celebrate my birthday. I can't wait to see which of my blog land friends gets to have the sassy jeans apron.


****Edited May 26, 2009 *****

Dear bloggers,

I have had some questions asked about how to make this apron just a little wider. This might be necessary if the jeans you are using are not really big. I use rather large men's jeans because that is what I have access to.
To widen the apron simply cut off the other pant leg of the jeans. Cut it as long as the desired apron. Cut the let seams open and trim up the pieces so you have two equal sized pieces. Simple add each of the pieces to the sides of the apron and sew them on. Then follow the tutorial as normal. You will now have a much wider apron with a very similar look to the ones in the pictures.
Hope that helps!

Thursday, April 24, 2008

Avocado Pie - April PPP

PPP


Avocado Pie
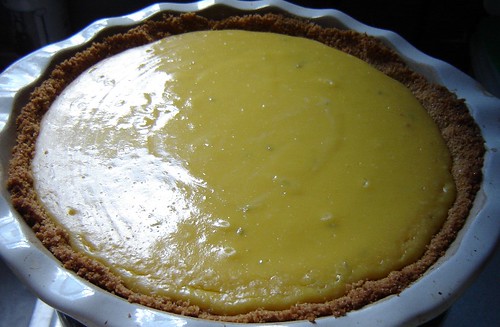
Yes that is Avocado Pie and it is really pretty good.
Why avocado pie? Because my Flirty Apron Swap Partner Nicola sent me a bunch of Avocados and I have been trying other recipes with them.
Here is the Pie recipe.

Avocado Pie

INGREDIENTS:
1 (9 inch) prepared graham
cracker crust
2 avocados - peeled, pitted and
pureed
1/2 cup lemon juice
1 (5 ounce) can sweetened
condensed milk

I prepared the pie crust and browned it in the oven (the March Pie has a crust recipe)
The I put the lemon juice, milk and avocados in the food processor and blended it till it was smooth. Pour this in the pie shell and chill in the fridge till ready to serve.
I served it with whipped cream on top.
This is an unusual pie. The flavor is light and fresh. Tart and sweet.

Mother's Day Give Away

I am posting this for my friend Jan. She has a lovely apron shop where she sells aprons, tea pots, tea cozies, cookie cutter and more.

Here is what she is doing.
Jan has set up a Mother's Day Giveaway on her blog.
She will be sending out this lovely apron to a lucky winner.
Mother's Day Apron
She is also including this teapot set and cookie cutters.
Mother's Day Apron 2

How do you get in on this wonderful giveaway?
Go to Jan's site and follow her directions.

I can tell you that her aprons are simply wonderful.
I have one. hee hee! I love it.
Jan was my secret partner for the Flirty Apron Swap.
She took a peek at my blog here and somehow figured out that I love chickens. She made me this lovely chicken apron.
Flirty Swap Apron
I wear it every chance I get. It is so fun, covers everything and is dark so I can use it for what ever I am cooking without stain worries. :o)
You should go check out her blog and store. Her aprons would make wonderful Mother's day gifts, birthday gifts, or just a treat for you!

Thursday, April 03, 2008

The Summer Sassy Apron Swap

Little Plug Here.
The Summer 2008 Session of the Sassy Apron Swap is now open over at The Sassy Apron Swap.
SASbutton
The sign ups are open till April 15th unless we get to many people and that might happen. We are almost at 100 on day 3. I am just posting it here for some of my regulars that have been asking and wanted a warning that it was up and running.

Tuesday, April 01, 2008

Flirty Apron ?

Here is my contribution to the Flirty Apron Swap. I messed around with my design a bit and changed the ruffle. I needed something flirty for a 50+ grandma with little grand kids.
Flirty Apron

Is it flirty enough? It is on it's way to the Sassy Grandma. I really love the cookie jar fabric.

Saturday, March 29, 2008

Key Lime Pie - PPP - March

My dear friend Rachel of the Country Cupboard Bakery suggested the pie for this month. She said she had tried Key Lime Pie once and thought it was lovely and wondered if I knew how to make it. Well, no but I could try.
Rachel runs this little Mennonite Bakery just down the road from my house, out in the middle of no where in South West Missouri. She has the most wonderful goodies there. Here Cinnamon Rolls are famous and positively sinful!!! She also stocks Jam from Das Jam Shop that is a local Mennonite Jam factory. They jams are simply divine! I love them!

On to the pie.... When looking up ideas I had some rules in mind.
It had to be tasty,
It had to be easy,
and it had to have reasonable ingredients.

Here is what I came up with.

Key Lime Pie
(sorry this is the only photo, I meant to take a lovely picture of a slice of pie topped with whipped cream and a slice of lime but it is all gone. Once we cut into it we forgot all about photographing it and just snarfed it down.)

Key Lime Pie for Rachel

4 egg yolks
2 (14 oz) cans sweetened condensed milk
1 cup Lime juice (key limes if you can get them and fresh if possible)
1/2 cup sour cream
1 tsp lime zest (optional as lime zest can be bitter)
1 - 9" pie graham cracker crust

1. Pre-bake your graham cracker crust.

2. Pre-heat oven to 370 deg. F.

3. Combine egg yolks, sweetened condensed milk, lime juice, sour cream, and lime zest. Mix well and pour into your pie shell.

4. Bake for 25 to 30 minutes.

5. Allow to cool. Top with Whipped Cream, garnish with lime slices, and enjoy!

There you have it, easy, fast, and good!

Easy Graham Cracker Crust

1 package graham crackers (9-8 whole crackers), or 1 1/3 cup crushed graham crackers
1/4 cup butter
1/4 cup sugar
Mix very well, pat into pie pan and bake at 375 deg F for 8 minutes.


Note: You can use 1/2 lemon and 1/2 lime juice. If doing that, I would use lemon zest instead. It tastes so much better.
Also if using farm fresh eggs, you will not get a greenish pie. It will be yellow. :o)

Oh I almost forgot to add the squeezing key limes is hard!! I was going nuts with my citrus juicer until I remembered my garlic press. I cut the limes in quarters and put them in there. It still took a while to get 1 cup of lime juice but my hands weren't killing me when I finished!

Thursday, March 20, 2008

March PPP - Carrot Pincushion Tutorial

These pincushions just make me happy! I love carrots.
Carrot 11

This should be a fast, easy, and painless tutorial. (if I don't talk too much)

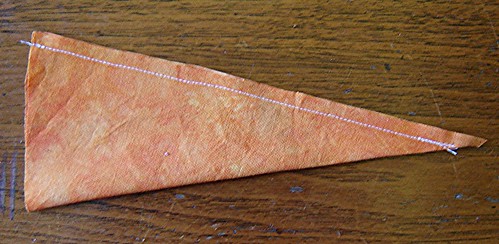
1. Make yourself a carrot template. You want a pie shaped piece. The angle of this triangle is about 45 deg. The sides are 9 inches long and the top is about 7 inches across. These are abouts. You want to make sure that the top side is curved like a pie piece though.
Carrot 2

2. Cut out your carrot.

Carrot 3

3. Fold the carrot in half and stitch along the long side. 1/4" seam allowance.

Carrot 4

4. Turn the carrot right side out. To get the point you are really going to have to dig it out with a pin or something. Be careful and don't push too hard and rip you carrot tip.

Carrot 5

5. Stuff the carrot. Start by putting tiny pieces in there and packing them in tight. You can then add bigger pieces but pack them in tight and keep squeezing and re-shaping the carrot as you go. You really want it tight.
Carrot 6

6. Take strong thread and make a gathering stitch across the top of the carrot. Pull it tight and stitch it in place and tie it off.
Carrot 7
Carrot 8

7. Tear off a strip of green fabric about 1" by about 12". Fold it in half and knot it near the ends.

Carrot 9

8. Stitch the carrot stem in place securely.
Carrot 10

You're done!
Carrot 1

Monday, March 17, 2008

What's in Your Easter Basket?

I went out to share some day old bread with my chickens today and brought in a little bundle of warm, wonderful, colorful eggs.
My Easter Basket
If you look carefully you can see that the one at the bottom right is green! I am so excited.
Bryan bought several colored egg layers last year and they are finally laying a basket of colored eggs for us. The egg in the center isn't white but next to the others it sure looks white. We do have a couple of white egg layers in the bunch too. The yolks of these eggs are simply gorgeous. They are almost orange they are so dark. I made vanilla ice cream yesterday with fresh eggs and fresh milk from the cow and it was golden yellow in color and OH MY GOODNESS was it tasty.
Here are my Fine Hens.
My helpers

I had to add this to my cornucopia of farmy goodness.
Bread n' Butter
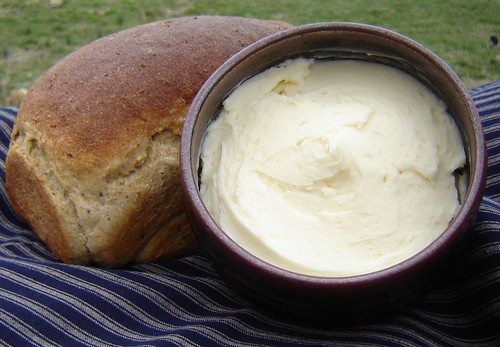
I just made our first batch of butter for this Spring. It is so tasty on the fresh whole wheat bread I made last night.
Here's the bread recipe.

Farm Fresh Bread

6 cups hot milk (heat on the stove)
4 Tbsp yeast
1/2 cup oil
1/2 cup honey
6 eggs (I actually used duck eggs)
6 tsp salt
3/4 cup ground flax seed
1 1/2 cups old fashion rolled oats
16-18 cups fresh ground whole wheat flour (I use hard white wheat but red is good too.)

Mix everything together and kneed until the dough is pulling away from the sides of the bowl. The dough might be a bit sticky.
Cover and let rise for an hour in a warm place. (I always keep checking on it and punch it down and flip it around at this stage, I just can't leave it alone.)
Punch the dough down again and divide into 6 loaves. Place in greased bread pans.

Bake at 400 deg F for about 25 minutes. If you are using glass or stoneware pans you might have to add 5 more minutes or so. I usually use metal pans.

This is a large batch so I usually freeze a lot of it and take out the loaves as we need them. This reduces the number of times I have to bake bread in a week.

Saturday, March 15, 2008

For Amanda

This winter my niece Rebecca had me help her finish up some of Christmas sewing. Of course I helped because it was for her Fabulous sister Amanda.
I made her a Sassy Apron of her own. It is just like my Sassy Little Aprons but this one is larger just like the one I made for myself.
This apron is double sided so here is side A with Poison Dart Frogs for when Amanda is brewing up her favorite poison.
Amanda 2
And here is her other side which reminds me of Van Gough. This side only has 2 frogs for when Amanda feels much less poisonous.
Amanda 1
Yes, you can read a woman by her apron. hee hee

Tuesday, March 11, 2008

Doll Swap Recieved

I got my doll!!! I was so excited. It came this weekend in a lovely red polka-dot package. It was so exciting. My lovely swap partner is the very talented Cheryl from Artsy Fartsy.
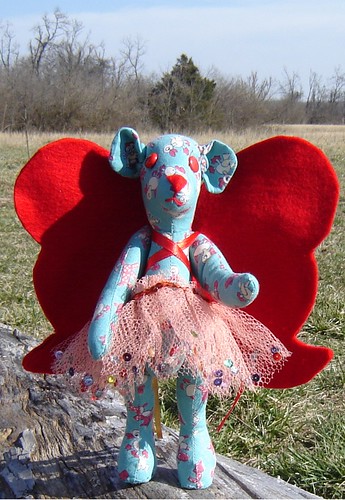
Here is my lovely Beary (Bear Fairy).
Doll Swap Bear
She is just shy of 9 inches tall. She is made of real vintage fabric (made from a little girl's blouse). She is just darling! I am so happy. She is MINE! Yes I will let some little girls hold her from time to time when they are very clean and being Oh so good. hee hee. They actually seem to like that Mommy has Dollies too and that they have to earn the privilege of touching them and playing in my room with them. It makes the dollies so much more special.
My swap partner also sent my a lovely vintage apron. It is faux smocked on red cotton gingham.
Doll Swap Apron
I just love it. I have always wanted one of these. I showed it to my mom and she just went nuts and said that this style of apron was all the rage when she was a teen and that she had made one for herself that was set on point. She was so excited and really loved handling it and remembering happy times. Thank you Cheryl!

Saturday, March 08, 2008

Easters Early

I have some little Easter Friends that I have moved over to my Etsy store. They are ready to ship out Priority mail to new homes in time for Easter if ordered by Tuesday, March 18th.
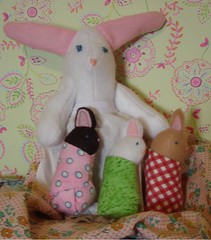
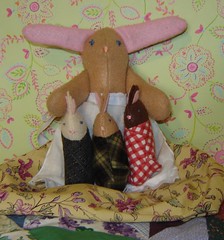
Flopsy, Mopsy, and Cottontail have grown up and have bunnies of their own.

Sorry, Cottontail has been sold.
Brown Rabbit 2 White Rabbit 1 Tan Rabbit 1

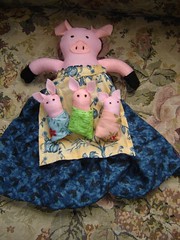
and their friend Mama Pig and Mrs Mouse.
sorry, mama pig has been sold.

Mama Pig Mouse 3

Sorry but Miss Flopsy already made it off to a new home, but the rest are here and ready to go.
Related Posts Plugin for WordPress, Blogger...