home tutorials recipes aprons/patterns Soaps

Saturday, May 31, 2008

Caroline-a in the Lolita

Caroline
Miss Caroline turns 9 tomorrow. In honor of her birthday I gave her a Lolita apron that I was honored to get to test the pattern. I just love how festive this apron looks. The pattern should be showing up very soon for public sale at Sew Liberated.

Friday, May 30, 2008

Retro Day

Our quilt guild, The Newtonia Battlefield Quilters held a mini retreat today. It was called Retro Day. The theme of the day was projects from the 1930's and 40's.
There was a gorgeous table runner with a wonderful vine and flowers made from 30's fabrics. There was a really fast and simple quilt made from 30's fabrics too. Of course I was too dumb to take pictures.
The other project just so happened to be an apron pattern made from vintage apron from the 1930's taught by yours truly. It was so cute and yes I took pictures. Each lady took her own spin on the apron.
Retro Day 2
These are four of the sweetest ladies I know. It was so much fun working with them today. There were several others there today too but they didn't get to making the apron.

We also had to bring our finished blocks for this year's raffle quilt that we sell chances for to make money for the guild to fund things like our Project Linus quilts and quilts we give to our community members when there is a need. (several went out with the tornado we had here and we will be making several more to donate.)
Retro Day 1
Aren't they gorgeous! I am so excited about this year's quilt. I love 30's fabrics.

Thursday, May 29, 2008

My Sassy Summer Apron Attempt

Ok I am just squeaking in here with my Summer Sassy Apron for the Swap. It was a bit of a challenge and of course I couldn't just buy a pattern and make an apron. I and to try designing things and that always has fudge factor and I didn't make a muslin mock up this time. (like I ever do).

Summer Sassy Apron From Lucy B

I had to have something that screamed summer and my partner likes bright colours (hint) and wanted something modern in the fabric. (I used a new line - to me at least).

Summer Sassy Apron Back from Lucy B

Sorry but my little lady doesn't have a back so the picture is a little lumpy. I made bias trim out of the yellow to go around the back, pockets, and hem. The ties are short and should reach around my skinny partner.

I posted it at the post office today with global priority (hint) so if you life out of the US and you haven't got your package and you are skinny and like bright colours, this apron just might be yours. Hee Hee.
I hope my partner likes it and that it fits. It is very hard for Chubby Chikas to make things to fit the skinny chickens.

Wednesday, May 28, 2008

Jill's Sweet Potato Buns

Sorry Jill but the picture was just too funny. I didn't realize you were standing behind the buns when I snapped the picture. Honest.
Sweet Potato Buns
OK Jill came over to my house and helped watch my kids while I had to run into Neosho with Bryan for an appointment. THANK YOU!!
I told her to make herself at home and that she could cook up anything she wanted to in the fridge. Well that is never a mistake when miss Jill is in your kitchen. She dug up an old favorite cookbook and made me the yummiest buns! She found a baked sweet potato in the fridge and added it to the recipe. It added so much nutrition to the bread and made them such a wonderful golden color.

Jill's Sweet Potato Buns

2 cups milk scalded
1 cup butter
1/2 cup sugar (could use honey)
3 eggs
2 tsp salt
2 Tbsp yeast softened in 1/2 cup warm water
10 or so cups of flour (white, whole wheat or a mix)
1 large baked sweet potato mashed up

1. Mix the milk, butter and sugar to melt the butter. Cool.
2. Add the yeast, eggs, salt, sweet potato and half the flour. Mix well.
3. Add the rest of the flour a bit at a time and kneed in until the dough pulls away from the bowl. Kneed about 1o minutes or so.
4. Put the dough in a bowl and cover with a dish towel and let rise for about an hour. Punch down.
5. Form into balls and place on a butter pan. Cover with a towel and let rise for about 20 minutes.
6. Bake at 375 Deg F. for about 20-25 minutes It depends on how big your buns are. They may need a bit more time.
Sweet Potato Buns 2

Sunday, May 25, 2008

May PPP - Cheese Pie

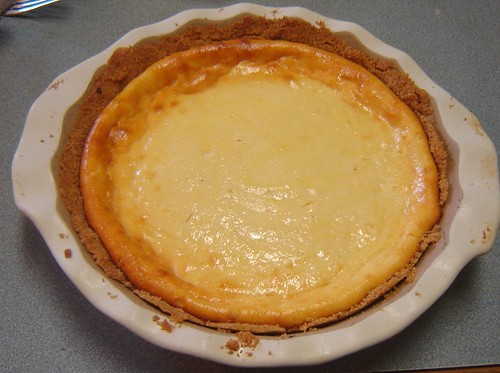
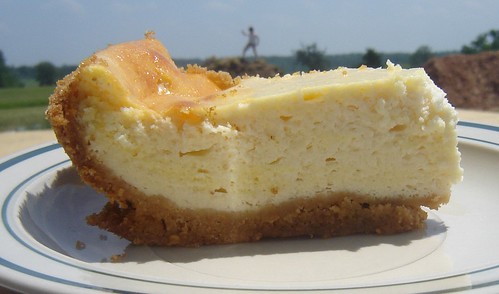
OK so I wanted to do Rhubarb pie this month but I can't get my hands on any Rhubarb so I settled for a cheese pie. It is SO good!

Cheese Pie 1

I got the original recipe from my Fabulous Niece Rebecca of Marvelous Pigs in Satin. You MUST check out her blog. I have changed the recipe just a tiny bit but will include the original information.

Rebecca's Cheese Pie
(healthful Cheesecake)

Crust:
1 1/4 cup crushed graham crackers
1/4 cup sugar
2 1/2 Tbsp butter
Mix together well in a food processor and pat into the bottom of a large pie pan.

Filling:
2 cups yogurt cheese **
1/2 cup sugar
2 Tbsp flour
1/2 tsp salt
3 large eggs
2 egg yolks
2 egg whites
2 Tbsp sugar

1. Preheat the oven to 325 deg F.
2. Mix Sugar, cheese, sugar, flour, salt, eggs, and yolks well.
3. Beat egg whites until soft peaks form, add sugar and beat till glossy peaks form.
4. Fold egg whites into filling mixture and pour into pie pan.
5. Bake at 325 for 45 minutes to one hour. Cool and serve.

Sauce

2 cups berries (strawberries or I like raspberries)
3 Tbsp sugar
1/2 tsp corn starch
Mix in a sauce pan and heat to a boil. Boil, stirring constantly for 1 minute. Cool and serve.

Cheese Pie 2

**
The original recipe called for
1 1/2 cups cottage cheese
1/2 cup cream cheese
1/4 cup yogurt

Rebecca said she has also used:
1 1/2 cups cream cheese
3/4 cup sour cream

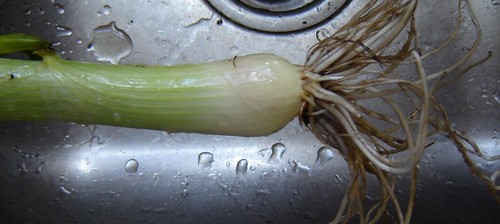
You get yogurt cheese by straining yogurt for a while. I have tried this with store bought yogurt and it didn't really work. I tried it with home made yogurt and it works very quickly. In about an hour hour have nice thick yogurt cheese that looks a lot like Ricotta cheese.

How to you make yogurt??
You heat some milk to 120 deg F. You add a couple of heaping spoonfuls of plain yogurt to it and mix in well. I use 2 quarts of milk at a time and like that.
Then you put it into a small ice chest. I pour boiling hot water in there first and then drain it out. That heats up your box. I put towels around the jar to keep it warmer. Then you let it sit for 12 hour or over night. Then have lovely homemade yogurt to eat. It is a little watery compared to store bought but tastes better and you can strain it for a little while and thicken it up that way.
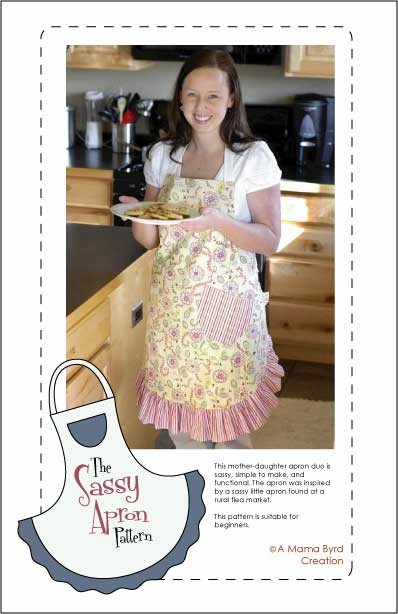
Tuesday, May 20, 2008

The Sassy Apron Pattern

I am so proud and excited to announce that my very first apron pattern is finished and ready for sale.
sassy-for-web
The Sassy Apron Pattern was inspired by a sassy little apron found at a rural Missouri flea market. It was such a happy sweet little apron that I quickly duplicated it and started making several of them.
A local quilt store contacted me a few weeks ago and asked me to whip up an apron pattern that they could use for the local chapter of the Sassy Apron Swap right here where I live. So with the help my three of my very talented nieces, I am happy to at last be able to offer up this Sassy little pattern for you.
The pattern will be going on sale this Saturday at my Sexy Apron Day, and My Little Byrd Nest Etsy shops. It will hit the quilt store on Friday.

The Sassy Apron Pattern is on sale for $8.95 (special introductory price) till June 1st.

Monday, May 19, 2008

Apron Angels

Valentine Aprons


Many of you are aware of my Apron Swaps I do. At the end of them I have been asked by some very wonderful participants if Apron Angels were needed to send off aprons to swappers that didn't get an apron for whatever reason.
The term Apron Angels has stuck in my head and after recent events in my community I would like to make a call out to My Apron Angels.
Just over a week ago on May 10th an F5 tornado and a few little ones as well, ripped through my community here in South West Missouri. Many lives were affected. We were fortunate to be unharmed. The tornado that wiped out the little town of Newtonia, missed us by only a mile.
The Monday after the storms I brought some bread and a pink apron to one of my friends hit by the storm. I was touched by how much the apron seemed to mean to her. The event got me thinking and I mentioned it to a couple of my Apronista friends and a plan was hatched.
I decided to make the call out to all my aproning friends around the country (if not globe) to send aprons to the women affected by this tornado. A couple of friends of mine in the community have offered to help distribute the aprons to the people affected.
Some of these women lost everything they had, other have had their live altered drastically and are trying to deal with the chaos that follows this kind of destruction both physically and emotionally.
We would like to send a message of love and encouragement with these aprons.
Aprons my be a simple bit of cloth and ruffle but they carry so much power with them. They are the uniform we choose to wear to serve and protect our loved ones. They are a message from our post and a hope for our future. They have the power to lift our spirits to remind us of happy times.
If you would like to be an Apron Angel and send a message of love and hope to these women, please contact me at byrdhouse1(at)windstream(dot)net. We will collect aprons here for several weeks and get them sent out to people as they come in. It would be nice if you could include a small note for your recipient.
Our goal right now is to collect about 100 aprons. I know there were more than this many affected but it is a start. We can use aprons from size 4-6 to 3-4XL.

Friday, May 16, 2008

Swapping Goodness!

I got really lucky this week with some pretty sweet swapping goodness.
First off, I got my quilt from the Four Season's Quilt Swap.
I was so surprised. I had been so worried about sending mine off that I forgot that I was getting one too.
Bryan is my mailman too and brought me a package from the post office and asked what in the heck I had ordered for Australia and did I know what the postage was on things from AU. I about died because I am usually very careful about where I order things from ebay and etsy but occasionally I will get carried away with the item I want and forget to check the shipping. (you know apron bidders can go a bit nuts sometimes.)
I opened the package and found this lovely quilt and about peed my pants!!
It is from Helen of Patch Work of Mini Grey.
It is so fantastic!
Spring Quilt from Helen
It has multiple layers and fabrics. The workmanship is simply wonderful. It is all Wonky and I LOVE that! The colors are so bright they just dance off the quilt. The flower and stem parts are made from string pieced bits. I love it!
Spring Quilt from Helen detail
Yes I am spoiled!

THEN......

I got my Summer Sassy Apron Swap Apron early. The aprons aren't due till June 1st. My partner gets a gold star! My partner was Paige from Paige's Page
The theme was summer and she took that plus my list of favorite things and came up with this.

Sassy Apron swap from paige 3

Chickens, yellow, red, black polka dots, what's not to love!

Here is the back detail.
Sassy Apron Swap from paige 2
Also too stinking cute.
Then to top it off she finished the rest of requirements with style.
Sassy Apron Swap From Paige 1
A chicken dishtowel and a sassy summer drink recipe (no alcohol thank you). To top it all off she made me a pair of chicken book ends. They are so darling. I will have to put them in my kitchen when I finish it. It will be so fun! I might just have to do a chicken kitchen.
Thank you Paige and Helen!!

Wednesday, May 14, 2008

New Construction

May 13 - 1
Yesterday we started construction on a new home for my mother. We had promised my dad that we would take care of her when he died and so we are building a granny flat on the side of our house for her. I have started a new blog where you can watch the construction. This is mostly for the benefit for the rest of my immediate family but if you are just dieing of boredom and have nothing else to do, you can come on over and watch her house go up at

Fabric Scrap Swap at Tracey's

Fabric Scraps


(original photo taken by Planet June)
My dear friend Tracey at Itching 2 B Stitching is hosting a fabric scrap swap. If she can get enough people to sign up you could get 2 partners. It is open until May 20th. To sign up you need to go over to her blog and get the information and email her. It sounds like a lot of fun. This is a great way to clear out some of your old bits and get someone else's little treasures. You know that one gal's scraps are another gal's treasures.

Saturday, May 10, 2008

Onion recycling Tutorial

I learned this tip a couple of years ago and have tried it and found that it works and is quite marvelous. I love to use fresh green onions but am always out or there is a slimy little bag of them in the bottom of the fridge.
Here is my marvelous tip for growing them yourself and recycling a bit.

Onion Recycling Tutorial
Onion 1
1. Take the onion you are using for cooking, green, red, yellow, or white, it doesn't matter.
Cut off the root end. You are going to do that anyway. For a bulb onion like a red, white or yellow, I kinda core the onion and cut out a little cone there at the root end.
Onion 2
This onion came from my garden so the roots are huge but the ones from the store work the same.
2. Take that root bit you cut off and plant it in dirt and water it well. You can directly plant this in the garden. I plant mine in a tub in my yard for easy onion access year round. You can even plant them in a flower pot in a sunny window.
Onion 3
There you have it. In a few weeks you will have tons of green onions for the picking. Actually I just take my knife out there and cut them off at the ground and they grow me another onion quickly. If you just need the green parts for your recipe, just snip off a few of the green things and chop them up. The onion plant will send up more and that will actually stop the plant from going to seed which makes the onion tough.
Onion 4
and yes I know my pot needs weeding. :o)

Friday, May 09, 2008

Spring Quilt

Spring Quilt 3
Last week I made a quilt for the Four Season's Quilt Swap again. This is the spring round.
I hope it will do. It is simple but I thought it was fun.
Spring Quilt sent by Lucy
I have sent it off to my swap partner. I hope she likes it.
Spring Quilt 2
happy bird detail
Spring Quilt 4

Sunday, May 04, 2008

Miffy's Birthday

OK you know how I feel about birthdays. They are for celebrating, singing and shouting about. It is the day you came to this big blue planet. That is pretty fabulous what ever you age is.
One of my friends on the Internet is celebrating her birthday with an apron give away. I am all for that so here is the apron.
Miffy's Apron
Isn't that to die for! It should be worth a birthday wish or two.
To get a chance at winning this apron you need to go on over to Miffy's World and leave her a birthday wish at this post.
So what are you waiting for. Run off and spread the birthday goodness all around.

Saturday, May 03, 2008

Skillet Pot Holder Tutorial - PPP

I think I saw this idea at a dinner. It was so cool! I love pot holders but hate having to grab for one all the time when I am doing a ton of cooling where I constantly have to pick up the pan, such as when I am making crepes. I have singed a good many darling hot pads in the process.
Well here is my solution and a very clever on at that (not my idea but my version of it.)
I decided to make a skillet handle pot holder. This stays on the handle while I am cooking. I don't recommend walking off and leaving it unattended but you shouldn't leave a hot pot unattended anyway. :o)
After making several apron from jeans, I have several bits of scraps left over. So this is my material of choice. It is heavy, durable, washable, and free.

Skillet Pot Holder Tutorial

1. Trace the handle of your skillet onto paper to make a pattern.
PH 1

2. Add a generous amount of space around your tracing to fill out your handle, maybe 1/4" to 1/2". Don't add too much space at the top or it will make your pot holder too long and it will keep sliding off. Cut out your paper pattern.
PH 2

3. Take a piece of denim twice as long as your pattern is. Fold it in half lengthwise. Fold it in half again the other way. This gives you 4 thicknesses. Place your pattern piece along the folded edge and trace it with pen or pencil. Sew on the traced line. (By using the folded edge, the bottom of your pot holder is already finished when you are done. )
PH 3

4. Trim within 1/4" of the sewn line.
PH 4

5. Turn and you are done.
PH 5

There you have it a pot holder that exactly fits your pan for quick, safe and easy fast cooking.
PH 6
Related Posts Plugin for WordPress, Blogger...