







home tutorials recipes aprons/patterns Soaps

Wednesday, September 12, 2007

Rucksack Tutorial

This year I have 4 kids heading off to school. I decided the make them backpacks and they all think that idea is cool. Here is a quick tutorial to show you how it is done. I am trying not to bog it down with too much description and too many detailed measurements to you can take the idea and make it your own.

material list
heavy fabric for the pack
coordinating fabric for the pocket and strap casings
about 3yds of heavy cord
grommets (optional)

Instructions:
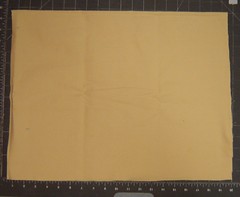
Rucksack 1
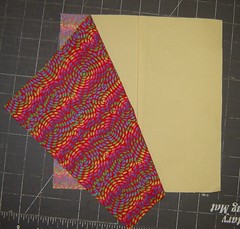
1. Cut out your pack. You need 2 pieces the size you want your pack plus seam allowances. This one is 14x19. I found though that I didn't leave enough room for the bag to close without squashing her folder. I would add another 3 inches to the height to accommodate that. You can test that with what you need to put in yours and measure that way.
Rucksack 2
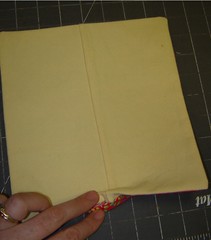
2. Make a pocket. Take a scrap of the bag material and line it with a bright fabric you want to use. Sew around the edges. Turn and press. Leave your opening where you turned on the bottom. My pocket is about 9"x9"
Rucksack 3

Rucksack 4
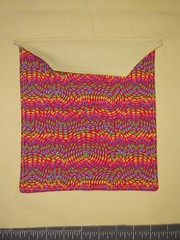
3. Stitch the pocket onto the outside of your rucksack near the bottom end. Stitch along the sides and the bottom. Re-enforce at the top to make it sturdy.
Rucksack 5
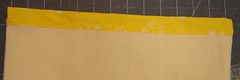
4. You can make a flap for your pocket. Just be sure it is a little wider than the pocket. I lined this flap as well. Stitched around it. Turned and pressed it. I then top stitched the edges to keep them neat. You can add a button, snap, or Velcro if you want.
Rucksack 6
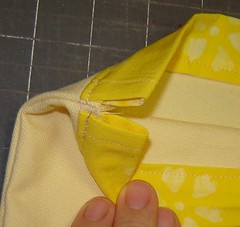
5. Now you need to add a casing at the top for the straps. I cut a strip of fabric 3" by the width of my bag. I then folded under the sides and top stitched them to make a clean edge. I folded the casing strips in half right side out and stitched them to the top of my bag. The edges of the casing them came right where my seam allowance for the bag will be. (they are stitched to the right side of the bag fabric.

6. Now put the front and back pieces right sides together and stitch the sides and bottom. Be sure to re-enforce the top seam. Turn and press your bag. Your casing edges should now meet.
Rucksack 7

Rucksack 8
7. Add the grommets to the bottom corners of your bag. You can use a press, or the kits you can get at the store. You can also leave the bottom of the bag open, string the straps through the casing then stick the ends into the bottom of the bag and sew them in with the bottom seam. You could even add loops to the side to attache them with.

8. Now string your straps. You need 2 straps long enough to go from the corner of the bag, up through the casings and back down to the same corner on each side of the bag. For a little back back the was about 1 yd each. It is easier to make it a little long and cut it down if you need to.
Secure the ties through the grommet hole with a sturdy knot.
Rucksack 10
Now you are done!
Sunday, September 09, 2007

Touched My Soul

I remember the first time I heard his voice. I was transfixed. His music touched my soul.
I think I mark times in my life with music. His is associated with some of my very happiest memories. I remember staying up all night in 1990 so I could hear the 3 Tenors' first concert at the World Cup. I was so thrilled.
I just wanted to honor his memory here with a couple of my favorite clips of his performances.
The one with his father really touched me. I loved the look on Luciano's face as he watches his father sing.
Ave Maria has always been one of my favorites.

Luciano e Fernando Pavarotti in

RIP Luciano Pavarotti - Ave Maria - Schubert

Friday, September 07, 2007

September Apron Tutorial - Jeans Apron #2

SA12
I actually had a dream about this apron the other day (must have seen one somewhere) and decided it was just the thing for September.

This one is almost too simple to tutorial but I will at least let you know what I did.

Supplies:
Pant leg
bias tape binding
1" twill tape

Here Goes:
SA1
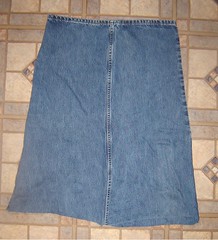
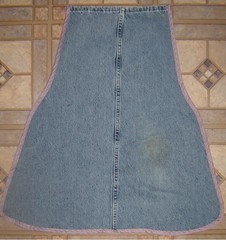
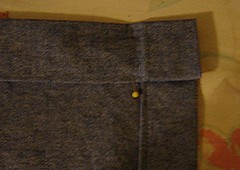
1. Cut the leg off an old pair of jeans. Cut up the inside seam and open the pant leg out flat.

SA2

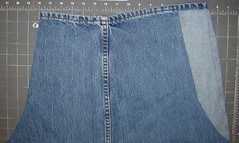
2. Cut the top of the apron the width you want for your chest. I used 12".
Then I tapered that down to the width at the waist.

SA3
3. Fold the pant leg in half now and trim up all the edges evenly. You will also want to clean up the bottom of the apron with a nice curve.

SA3
4. Now trim out all the edges of the sides and bottom with the Bias tape. I used wide double fold bias binding. I used the 3 stitch zig-zag just for fun.

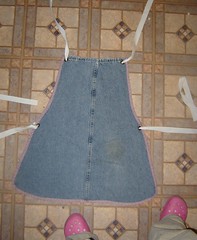
SA5

SA6
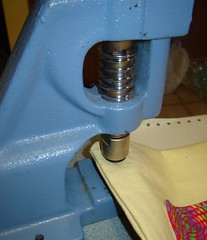
5. Now add your straps. I used a grommet press because there was one on my counter top, just begging me to use it. I then added the twill tape. You can use ribbon or fabric or what ever you want. Just make sure you make them long enough to tie at the neck and waist.

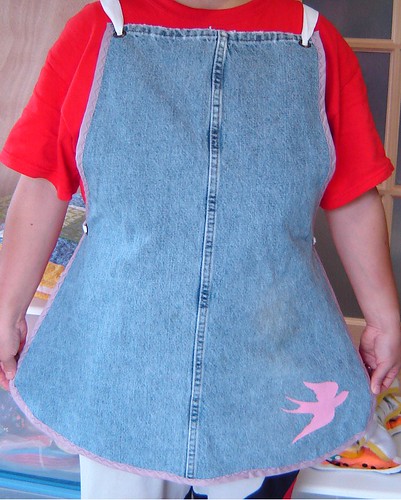
Jeans Apron #2
Now you are done! Too cute and too fun!
I have a couple extra for sale at My Little Byrd Nest

Wednesday, September 05, 2007

Hen Day - Pesto

It is Prairie Hen Day again!!! I love Wednesdays.
Today we went to Vea's house to visit, eat good food, and make fresh pesto.
I have an obscene amount of purple basil in my garden. Enough to send every one home with a pint or two of pesto. We just kept licking our fingers. It was SOOOO GOOD!
Photo Sharing and Video Hosting at Photobucket

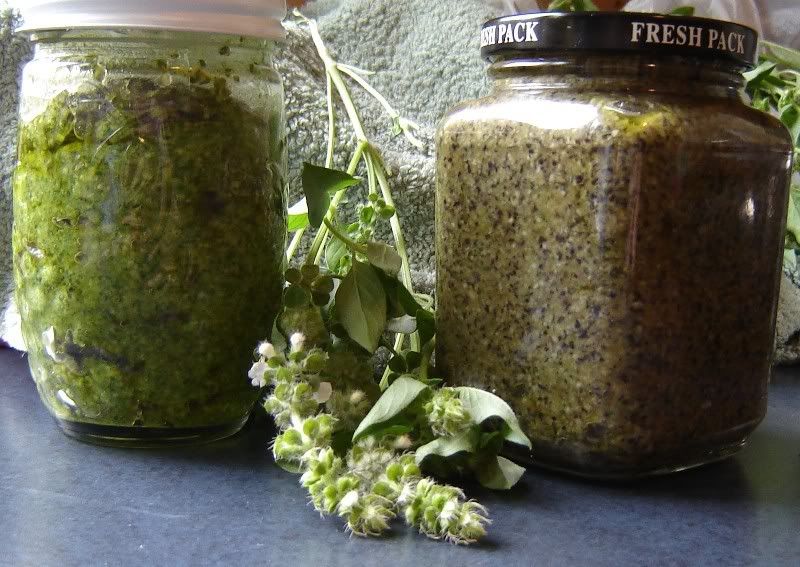
The pesto on the left is made with bright green lemon basil.
The pesto on the right is made with dark purple basil.
Both are very tasty.
Here is the recipe
Walnut Pesto
1/2 tsp salt
2 Cups fresh Basil leaves (2 oz)
1/3 cup Olive Oil
1/2 cup walnuts
2 cloves garlic
1/2 cup grated Parmesan cheese
Put everything in the food processor and blend well.
Makes just more than a cup when you are done.
To use: add 2-3 Tbsp to a pot of pasta with a little of the pasta liquid.
For our wonderful meal (sorry, no pictures, we ate it too fast!) we fixed sautéed chicken and zucchini with pesto sauce.
So good and so good for you!
I am making a blogging request here. Please post comments with your favorite uses for pesto sauce.

Saturday, September 01, 2007

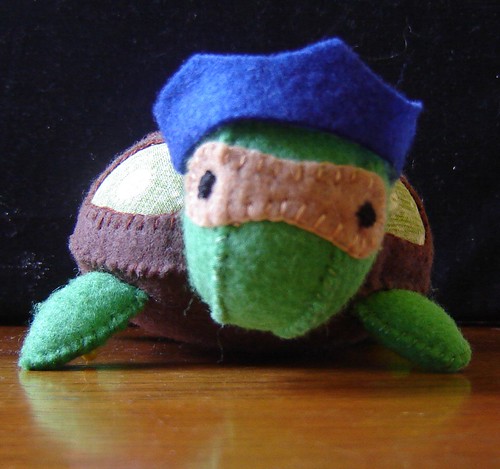
I Have A Little Turtle

Turtle 1

Turtles
I Have a Little Turtle
I have a little turtle,
He lives in a box.
He swims in the puddle
And he climbs on the rocks.
He snapped at a minnow
He snapped at a flea
He snapped at a mosquito
And he snapped at me.
He caught the minnow,
He caught the flea,
He caught the mosquito,
But he didn't catch me!
Turtle 2
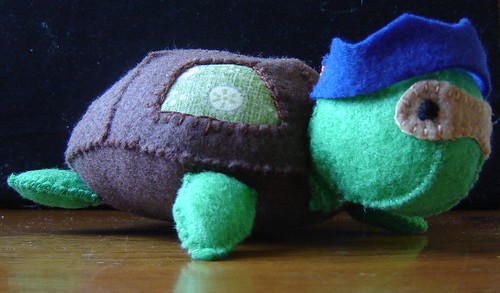
He is just too much.
I had to make him when I got my pattern from
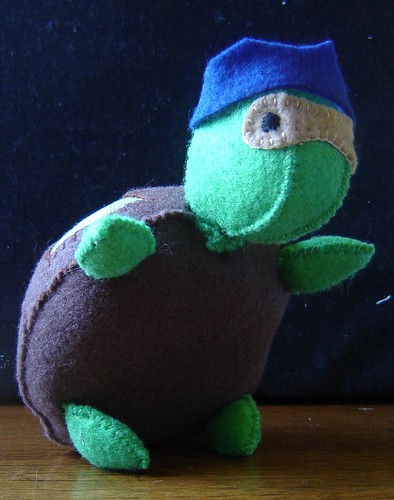
Turtle 3
He really is quite sweet and friendly.

Wednesday, August 29, 2007

Why Prairie Hens???

I have been asked why we chose the name Prairie Hens. We we had to call ourselves something. We realized that we had become organized and we needed a name. We are bent on a purpose and like the Order of the Phoenix we are united in a cause to fight evil (OK the mess in our homes). I love chickens and their many references in literature and Scripture. Well we couldn't call ourselves the chickens though.
We remembered a story we had heard about prairie hens. I think they are one of the bravest creatures I know. When they are faced with with a prairie fire the mother hens will hunker down call their chicks in and not move. The fires will come and pass over them. The mother will die but by doing so she saves the lives of her children.
We are all mothers in our group and our aim is to serve and protect our families as best we can.
On our little farm we have several chickens and I have loved watching the mamas with their children. It is amazing how in a few short days that mother hen and teach those flighty little chicks to come when she calls. When danger nears her family she will puff herself up and stand between them and the danger. She will call her babies to come and they all do. It is quite remarkable.
So with these wonderful examples in nature, proudly call ourselves the Prairie Hens.
We also all happen to live in an area of Missouri that was originally called Oliver's Prairie and knew we had to have that name.
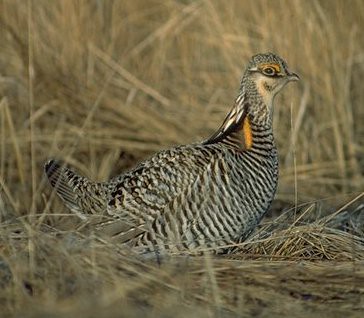
Prairie Hen

Hen Day

Every Wednesday, the Prairie Hens meet. We gather and one Hen's home and help her accomplish a project that helps her with her home and family. The group is made up of 5 intelligent, creative and very busy women. Collectively we have 28 children ranging in age from 2 month to about 30 yrs. old.
At each weekly meeting of the Hens we work on a project chosen by the hostess. The hostess also provides the entertainment for any children that come along for the day. The visiting Hens bring a delicious lunch for all.
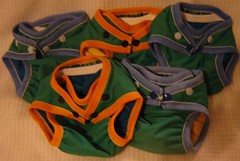
This week the Hens came to my house. This was an odd week so we had a special project planned. We worked on making diapers for baby shower gifts for some of our friends.
Diapers 1
All the hens have donated supplies to make them.

I also squeezed in a few for Jeddie too.
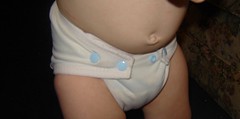
Diapers 2
He wanted to demonstrate how to open them.
Here he is sporting one for you to see how well they fit.
Diaper 3
He loves to run around in just his diaper. The new ones are so stinkin' cute, I let him.

I fixed the food today since it was an extra work day. I promised the Hens I would post the recipes here.
I am on a very strict low carb diet right now so I fixed a recipe that would work for all of us.
I made Ham and lettuce wraps for me and Ham and no kneed bread for the Hens. Both were served with Basil mayonnaise. I think you could spread that stuff on card board and it would be to die for!
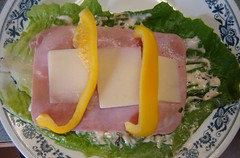
Lettuce Wrap
This is a leaf of Romaine lettuce, 1 tsp basil mayo, 1 slice of lean ham, some asiago cheese, and some sliced bell pepper.

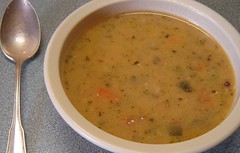
I also served African peanut chicken soup. Sounded weird but tasted too good and was in my carb ok list (I had to pull all potatoes out of mine and only at a small serving of it.)
Peanut Soup
Here are the recipes.

Basil Mayonnaise
1 cup mayonnaise (use the canola oil kind)
10-15 basil leaves
1 tsp salt
1/4 tsp pepper
1 tsp lemon juice
1 Tbsp olive oil
1 tsp minced garlic

Place above ingredients in a blender and blend until smooth.

(this recipe wasn't used but I promised Miyuki that I would share it)

Cilantro Mayonnaise
¾ cup mayonnaise
¾ cup loosely packed cilantro leaves
1 Tbsp lime juice
1 tsp soy sauce
1 clove garlic
Place everything in the food processor . Blend till smooth.

African Peanut Chicken Soup
INGREDIENTS
8 cups chicken broth
2 cups diced chicken meat
1 cup peeled and cubed potatoes
1 cup diced carrots
1 cup diced zucchini
1 cup broccoli florets
1 cup tomatoes, chopped (canned or fresh)
1/2 cup chopped celery
1/2 cup chopped onion
1/2 cup chopped green bell pepper
2 cloves garlic, minced
1/2 cup peanut butter
1 tablespoon chopped fresh parsley
salt to taste
ground black pepper to taste
DIRECTIONS
In a large stock pot, cook the chicken in a little olive oil. When it is done add the onion, celery, peppers, and carrots. Saute for a few minutes. Add the broth (8 cups water and 8 tsp Knorr chicken bouillon) and potatoes. Bring the soup to a boil, and then reduce heat to medium. Cook for about 10 minutes, till vegetables are tender.
Add zucchini, broccoli, tomatoes, celery, onion, green pepper, and garlic. Simmer for about 8 minutes.
Add peanut butter, parsley, salt, and pepper; stir until peanut butter is fully blended. Simmer for 3 minutes longer.

Monday, August 27, 2007

Healthy Tip #2 EAT

My healthy changes baby step number 2 is to eat in a timely manner.
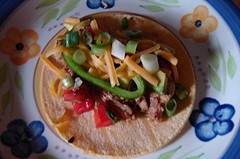
Taco
What I mean by that is this. If you eat before you go to bed your body processes all the calories you just ate and stores them in the body. So my first eating tip is ....

Don't eat less than 3 hours before going to bed.

You will be going to bed just slightly hungry. By doing this, your body will now work all night burning fat for energy rather than the carbs you just ate.
My second eating tip is .....

Don't eat less than 2 hours before working out.

When you work out (walk, run , whatever) right after you eat, you end up burning up the calories you just ate. While that might be convenient if you really splurged and need to lower you blood sugar levels. However, you won't touch your body fat.
If you have been dieting and working out and are not losing any more weight, try watching your eating, sleeping and work out times.
I have tried this now for 3 weeks and have lost about 9 pounds. I make sure that I get a big drink of water before I work out and a big drink after. Then I eat a sensible snack.

(remember that I am not a Doctor and you should always talk to yours before you do any serious health changes in your life.)

Sunday, August 26, 2007

Damsel In This Dress - Renaissance Festival Corsets

Michelle
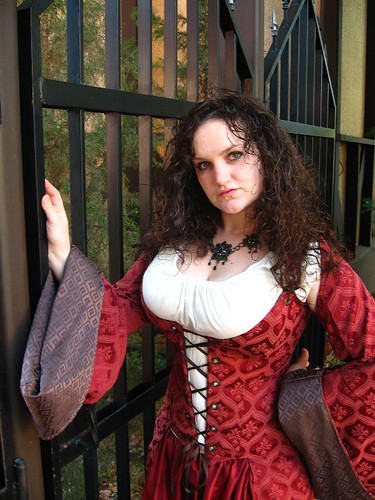
I had to share this. My friend Michelle makes the most beautiful corsets I have ever seen. She sells them at Renaissance Festivals all over the country. You can buy them there or you can get them through her e-bay store or here. She also has a website where you can see all her lovelies.
I got to help her sew up skirts for her outfits this spring and it was so much fun. These make the best costumes ever!!
Go check her out!

Banana Bread

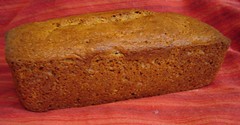
We have been trying to cut bad carbs from our diet without sacrificing our favorites. I altered my favorite banana bread recipe and the kids love it. The sugar has been cut back and we upped the fiber content.
Banana bread 1
Better for You - Banana Bread
3 1/2 cup whole wheat flour
3 tsp baking powder
1 tsp salt
1 tsp baking soda
2 cups mashed ripe bananas (4-6 bananas)
2 Tbsp lemon juice
1/2 cup canola oil
3/4 cup sugar
2 Tbsp flax seed
3 eggs
3/4 cup milk
1/2 cup chopped nuts
Mix dry stuff. Mash the bananas with lemon juice, set aside. Cream oil and sugar, add eggs and beat until fluffy - 4 minutes. Add flour mixture alternately with the milk. Don't over mix. Fold in bananas and nuts. Pour into to large bread pans. Bake at 350 for 1 hr.
Banana bread 2
This isn't really sweet but it tastes like bananas and is nice and moist.

Tuesday, August 21, 2007

Healthy Tip #1 WATER

I have been working very hard on my diet and exercise recently and have been baby stepping it. (I am a Fly Lady fan and love the baby step approach to life changes.)
I want to post some of the baby steps I have been making to help me toward the goal of a more healthy body.
Healthy tip #1 is water.
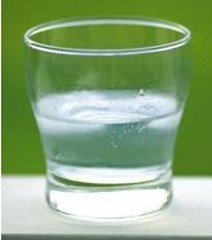
Water
I know that sounds pretty basic but we don't drink enough water.
Here is the water plan.

  • Drink a glass of water when you get up, before you eat or do anything. This helps cleanse your body.
  • Drink a glass of water about 30 minutes before breakfast.
  • Drink a glass of water before your morning snack (if you have one)
  • Drink a glass of water about 30 before lunch.
  • Drink a glass of water before an afternoon snack.
  • Drink a glass of water about 30 minutes before dinner.
  • Drink a glass of water before and evening snack (if you have one)
  • Drink a glass of water before going to bed.
That is 8 glasses of water. That is a great start. You should get at least 2 liters of water a day.
Always make sure you drink water before working out, and again afterward.

Don't drink at meal times. If you have to then drink water instead of pop, juice or other drinks.
By drinking before you eat, you tend to eat less. It also helps to cleanse your system.

Friday, August 17, 2007

Peg Doll Party

8
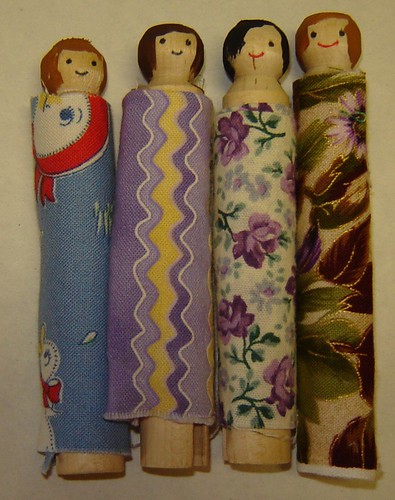
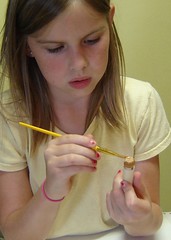
My oldest daughter, Sarah, turned 10 this week. With the confusion of starting a new school year, we opted for a quiet birthday with a couple of good friends. We chose to have a peg doll party. What is that?? We took old cloths pegs and made dolls with them. It was great fun.
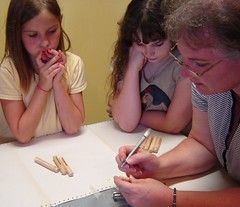
First we helped them by drawing faces.
1
Then the girls pained on hair with acrylic paints.
2
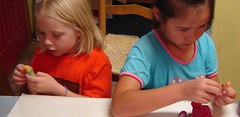
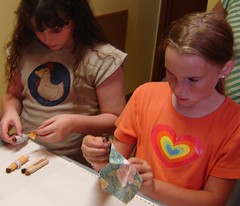
Then the girls chose fabrics from my scrap bag to make their dresses. We hot glued these in place.
34
Here are the creators.
5
Anne, Sarah, Caroline, Olivia, Hannah, and Natalie.
The creations.
6
I know it is blurry but it was the best of the lot. No one could hold still.
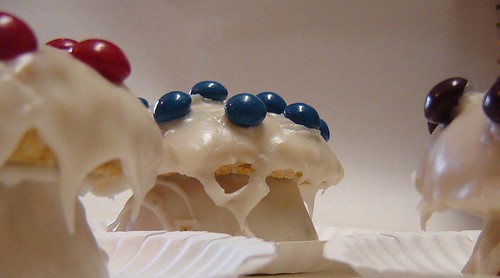
The Cake
7
We tried to make mushrooms but got gooey blobs instead. The idea came from Martha Stewart, but I am SO NOT Martha!
I will share the frosting recipe though. It is like crack on just about anything. Holy cow! we were ready to lick our kids faces it tasted so good!
Butter Glaze
2 3/4 sticks butter (11 oz) (I always use salted, it tastes better)
3/4 cup plus 1 tbsp milk
3 pounds powdered sugar (sift it!! ask me how I know!)
Melt the butter over medium heat until good and bubbly. I found that this cooks off any funky flavor in your butter (if you happen to have that). Stir in the milk.
2. Whisk in the sugar until the mixture is thickened but still pourable and so there are no more lumps. (about 4-5 minutes)
USE IMMEDIATELY!!

You can ladle this over cookies, cakes, whatever. Place them on a rack over wax paper to catch the drips.

Little Jed Horner
Little mister JEB sat down on his Lard bucket to enjoy some tasty crunchings and munchings.

Tuesday, August 14, 2007

August Apron Tutorial - Paint Smock

Teaser!!!Hannah
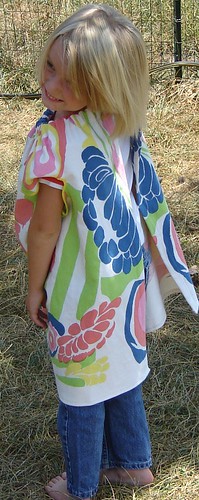
I finished uploading all the photos but have to run out the door to work for a couple of hours. I will finish posting the tutorial then. Hee Hee It is too much fun. Can you see the Kindergarten excitement on her face!
******************************************************************************
Ok I am Back from work now and can post away. If you couldn't tell, the Apron for August is a paint smock. This is a pattern my mom made almost 30 years ago when my little brother Jonny went to Kindergarten. I was so jealous and thought it was the coolest thing ever. I loved the fabric border.
On with the tute....
Supplies:
1 yard heavy fabric (denim, canvas or a heavy twill)
narrow double fold bias binding
3/4" elastic
Thread
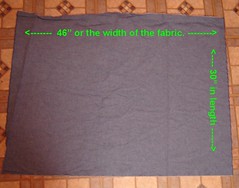
1. Cut out your fabric 42" by 30" (or the width of the fabric by 30")
PS1
(yes I know the photo say 46" that is ok too.)
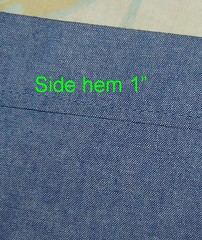
2. Hem up the sides first you can make this any measurement just fold it under at least 1/2" and then again so that the finished width of the smock is about 38 to 40 inches.
PS2
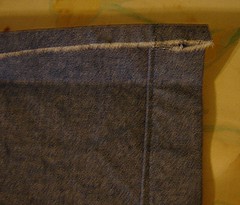
3. Now you need to hem the top and bottom. The top is very important. This is the casing for the neck elastic. I folded mine down 1/2" inch and pressed it very hard.
PS3
Then I folded in under 1" to 1 1/4". I also pressed this very hard with the iron. This really helped when I went to sew such heavy fabric. Top stitch this casing.
PS4
Hem up the bottom in a similar fashion so that the finished length of the smock is about 25".
4. Now you are ready to make the arm holes.
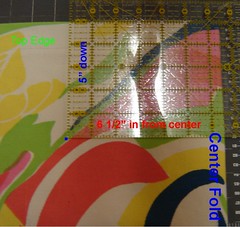
Fold the smock in half from side to side. Measure down from the top 5" and in from the center fold, 6 1/2". Make a little mark.  Measure over from this dot about 5 1/2" inches (away from the center fold and also 5" down from the top). These are the two ending marks for the arm hole curve.
PS5
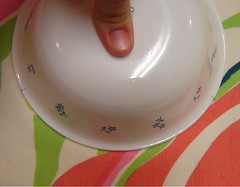
Now here comes in the technical tool time. Hee Hee. Get a largish cereal bowl. I use a glass bowl I found. PS6
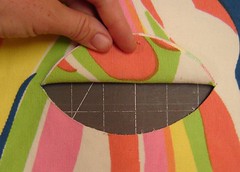
Connect the dots on the smock with the curve of the bowl and use a rotary cutter to cut the curve (or draw it with a pencil and cut with scissors). Make sure you go through both layers.
PS7
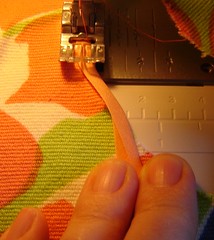
Now bind off the arm holes with the narrow bias binding tape. I just started in the center of the bottom of the hole and used a zig zag stitch to secure it. It was a little tricky at the corners but if you go slow it is ok.
PS8
Oops! I almost for got the elastic. Cut a piece of 3/4" elastic, 19"long. Thread it through the casing at the top. Secure the ends by overlaping and tacking down with thread.
Now you are done!!
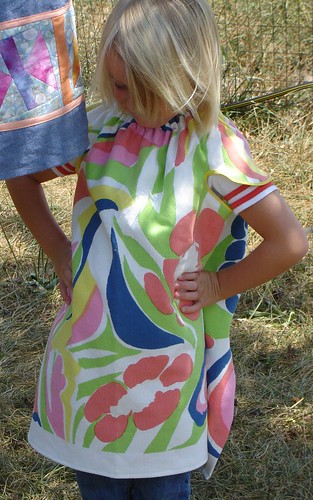
Too Cute!
PS 9
****************************************************************
Now for personalizing your own Smock.
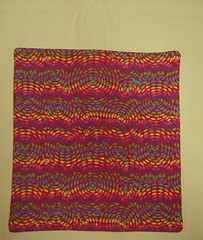
On the original smock there was a pieced border. Of course I had to do the same. I took scraps of my hand dyed fabrics and made some smocking funnesss. One of these is for Hannah, One for Ana and the rest are going into my etsy and hyena cart stores. If you are interested take a look!
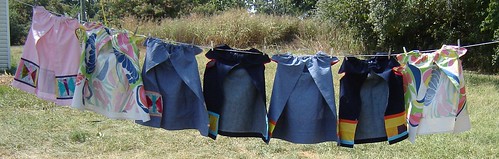
Here is the parade of Smocks
Paint smocks and cute girls
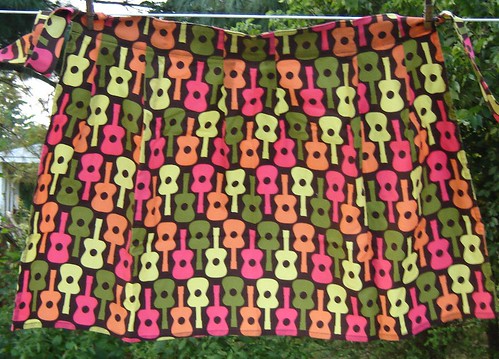
The backs of the smocks. It was too fun not to post.
Paint smock backs.

Sunday, August 05, 2007

Pancakes Worth Eating

Pancakes 001
I grew up on good whole wheat pancakes and as a kid I assumed everyone else was eating the same goodness. I was so disappointed the first time I ate pancakes in a restaurant and discovered white pancakes. They looked like pancakes but sure didn't taste like them.
I have to share my recipe with you. I hate to think of other poor children out there eating paste pancakes. These taste so good and are so easy to make. The recipe has been adapted from several sources. The original is from my sister-in-law Lee (she has lots of good recipes at her site), I added my Dad's secret ingredient (corn meal), and my sister Anne's use of 3 eggs.
Whole Wheat Pancakes
3/4 cups whole wheat flour
1/2 cup white flour (I actually use all whole wheat)
1/4 cup corn meal
1 tsp salt
2 Tbsp ground flax seed (optional - this adds more nutrition and fiber)
3 tsp baking powder
2 Tbsp honey
1/2 cup oil
3 eggs
1 1/2 cups milk
Mix dry ingredients in a bowl. In another bowl, mix the wet ingredients and whisk them together well (this is important to dissolve the honey and to make sure the eggs are mixed in).
Add the dry ingredients and mix until just mixed together. Don't over mix (mom's rules).
Heat a skillet or griddle on med heat and spoon or ladle batter on and cook until the bubbles stop popping on top (mom's rules again, helped teach a little kid how to make pancakes).
I have found that using a large ice cream scoop makes good 4" sized pancakes.
This batter doesn't make the pancakes too thick. I like it that way they don't get doughy in the middle (something that little kids just can't stand).
The pancakes aren't complete unless they have home made syrup to top them off.

Homemade Maple Syrup
1 cup white sugar
1 cup brown sugar
1 1/2 cup water
1/4 cup corn syrup
1 tsp Mapleine maple extract (I get it at my local grocery store pretty cheap)
1 tsp vanilla extract
Mix everything but the extracts in a sauce pan and bring to a boil. (the corn syrup keeps the syrup from crystallizing). Boil for 2 minutes. Remove from heat and add the extracts. Store in a bottle in the fridge.

Apron Find

Apron
I found this fun little site last week that has some really cute and fun aprons. I thought I would share the link with you. I am loving my apron. The style is really fun and the fabric is just fabulous. I got it at Parvani Style at Hyena Cart.
Related Posts Plugin for WordPress, Blogger...