home tutorials recipes aprons/patterns Soaps

Tuesday, February 22, 2011

Jeddie's Fabulous Fish Sticks

The idea for this recipe came from my little boy's Sesame Street Cookbook. Oscar has a great fish stick recipe in there and we adapted it to what we had on hand.

Jeddies Fabulous Fish Sticks


Jeddie's Fabulous Fish Sticks

Fish Fillets - cut into strips (talapia, cod, and orange roughy are good)
milk
flour
bread crumbs
seasoning mix (we like Mrs. Dash Table Blend)
pepper
butter

Cut your fish into eatable strips (what ever size you like).
Set out 4 pie tins or deep plates
-In the first one put milk
-In the second put flour
-In the third put the bread crumbs and the seasonings (I started with 1 cup crumbs and about 1 tsp seasoning and had to keep adding but we use lots of fish). Pour the melted butter (about 1/4 cup) over the crumbs and mix together.

Dip the fish pieces in this order
1-milk
2- flour
3- milk (quickly so it doesn't get soggy)
4- Bread crumbs, seasoning, and butter mix

Then put them on a baking sheet.

Bake at 450 deg F for 10 to 15 minutes depending on how thick the fish is.
They are done when the fish fakes apart with a fork. We noticed that the fish looked a little "soft" when the timer went off but that it firmed up as it rested a little on the tray. Test it with a fork.
Serve with your favorite sauce.
Ours is store bought tar tar sauce. I know I should be making my own but I haven't found and remembered a recipe I like yet.
We are open to suggestions. :o)

Another great cookbook to use with children is Kid's Favorites Made Healthy.

Sunday, February 13, 2011

Soap Winner!

Thank you to all that stopped by and left a comment.

Soap Day 002


The winner of my soap giveaway is....


Schneiderbären said...
Danke für das schöne Candy, Deine Seifen sind einfach super.

Liebe Grüße
Claudia

She gets to pick out 10 scents and I will send them off her way.

Sorry to those of you that didn't win. Thank you for checking out my Etsy shop and giving it some LOVE. :o) You are wonderful.

I will have another fabulous giveaway from my shop in another week or two so come back and check soon.

Friday, February 11, 2011

Friday Give Away! - Soap Samples

I have been snowed in for almost 2 weeks with my five kids. I am ready for something fun today!

Snow day

(we actually got a lot more snow than this, this was the first little bit of snow)

So .... to break the the monotony I am doing a little give away.

I have chosen to give one of my Sample Size bar packages. These bars are 1/4 the size of my regular bars. It gives you a chance to try several of the soaps with having to break the bank to check them out.

sample bars 025

This Sample Pack is for 10 bars of your choice.

If you are picked as the winner, you get to pick the 10 sample size bars I send you.

And YES it is open to international bloggers.

I will take comments all day today and will pick a winner Saturday night/Sunday morning.

To enter the giveaway, leave a comment.

To get an extra entry, go to my etsy shop and favorite it and come back and tell me what soaps you like.

To get 5 extra entries, post the giveaway on your blog (or facebook page) today and come back and leave a link to your blog.

Tuesday, February 08, 2011

Oort Clouds - A Snow Dying Tutorial

300 posts!! I can't believe it and here is another tutorial.


Blizzard 2011 001


Welcome the the Blizzard of 2011. I have lived here in Southwest Missouri for over 25 years and have never seen snow like this. We got 20 inches of snow last week and it is still here. Amazing. The funny thing about Missouri weather is that it changes all the time. Just over a week ago we had temperatures in the 60's and 70's. The kids were wearing shorts outside. Then 3 days later we were in the middle of the biggest blizzard I have seen since I was a little girl. (maybe not even then)
We cancel school here when there is 1 inch of snow. We are on our second week of NO SCHOOL (except for the one kid doing home school, poor kid just keeps plugging away at his work).
With so much snow at hand and no prospect of it melting for a week, we decided to give Snow Dying a dry. I have seen fabrics labeled as "Snow Dyed" at quilt shows for years but never had enough of the white stuff to give it a try. Well now I got my wish. Happy day!!!


Snow Dye


The procedure is very simple and so much fun to watch.

1. Prepare your fabric for dying by soaking it in Soda Ash solution (1/2 cup salt, 1/3 cup soda ash, and 1 gallon hot water). Soak the fabric for 30 minutes. The fabric has to be 100% cotton and pre-washed to strip off any finishes. Squeeze out the fabric.


Blizzard 2011 013 (800x527)


2. Scrunch up the fabric in the bottom of a tub. You can fold it too.


Blizzard 2011 014 (800x800)


3. Pack the tubs with snow.


Blizzard 2011 015 (800x534) Blizzard 2011 019 (800x547)


4. Sprinkle dyes right on the snow. I use Dharma Trading Co for my dye supplies.

Blizzard 2011 001 (385x800)


5. Watch the snow melt. This will take a while unless you have a very well heated room. I used my laundry room which has no heat to it. So.... The next morning the snow wasn't that melted. I moved them to the kitchen and them started melting pretty quickly.

6. Finally rinse them out under running water until the water is mostly clear. Then wash them in a top loading machine with synthrapol detergent. If you can't get this, you can use some Dawn dish detergent (about 1 tbsp for a full load).
I washed mine twice, the second washing was in my front loader machine on sanitize with my regular detergent. Then dry them.

Here are some close ups of some of the fun bits.
Blizzard 2011 016 (800x533) Blizzard 2011 017 (800x533)
Blizzard 2011 018 (800x533) Blizzard 2011 024 (800x533)

My daughter thinks they look like Oort Clouds. I think she is right. :o)

I think the browns are my favorites. That could just be because they are warm colors and it is so cold this week.

TIPS:
The thing I found to make the most difference was using "mixed" colors not pure primary colors. As mixed color dyes move through the snow and the fabric, they separate and move at their own speeds. This results in the best coloring on your fabric with the most crackles and fissures on the cloth. I love it!! I can't wait to try it with some serous greens and yellows. Only problem is what to do with the fabric now. Sad thing is they will most likely just end up as soap wrappers. I use my own hand dyed fabrics for my soap wrappings.
I think the colors are so much more vibrant because I used dye powder directly on the snow instead of dye solutions. This makes the colors more intense.
Next tries might include putting the fabrics or a rack instead of in tubs so the water drains away. Will see what affect that has. :o)

Monday, February 07, 2011

My Own Towel

With a vain attempt at order..... we made some personalized towels this week. The theory is that if you have your OWN towel, then you will be responsible for it, not leave it on the floor (because Mom WILL know it is YOURS).
At any rate the kids love them and maybe that alone will help them to take care of them. I love new towels too. I let the kids pick out their towels which gave them some ownership in the project which is always a good thing. :o)


Towels tutorial


Here is the quick and dirty tutorial to personalized towels.

1- Print out (or draw) your initials. Very Fat, Chunky letters do a better job of showing up and showing off fun fabrics. Be sure to reverse the letters or they will end up backwards on the towels.
Aprons 005 (800x533)
2 - Trace the letter onto the paper side of "Lite Heat 'n Bond" (my fusible web product of choice).
Aprons 007 (800x534)
3 - Cut out around the letters, leaving a boarder of paper around the letter.
Aprons 011 (800x746)
4 - Iron the letter the back side of your fun fabric. (follow the fusible web instructions)
Aprons 013 (800x534)
5 - Cut out the letter on the lines and position it on the towel and iron in place (follow package instructions again).
Blizzard 2011 013 (800x484)
6 - Stitch around the letter using a zig-zag or satin stitch.

Blizzard 2011 014 (800x533)


7 - Add a tab for easy hanging (optional).

Towels
These make great party favors for kid's parties or birthday gifts. Use a picture like a crown, shield, car, cat, etc. and have a stack ready for spur of the moment birthday gifts for your kid's friends.

Tuesday, January 11, 2011

Crumpets For Me!

Tea and crumpets
I love reading books that have great food descriptions in them. I love food and it is one of the details I love to see in the background of a story. Growing up I read many English literature books and was always interested in what the people had for "tea". I was especially interested in crumpets since I had never seen or had them before. I imagined all kinds of cookies, cakes and such when I heard the word. I was very disappointed when I finally had one and found that they were like English muffins. Not one of my favorites.

Then I was reading one of Anne Perry's William Monk books. In it Hester was snatching a precious moment to herself and got to eat a hot crumpet with her tea. This was a rare treat for her. She described the crumpet with it's crispness and softness and the hot, melted butter that was in danger of running down her elbows if she didn't hold it just right and eat it quickly enough. I was sold on crumpets right there.
Now, after some searching, I have found a recipe that I like and I can enjoy a crumpet to myself (or with my kids). I hold it just right and eat it quickly to prevent the pool of melted butter from dripping on my hand and running down to my elbow.
I did have to do some searching.
The first recipe I found to way too much time, 3 hours from start to first crumpet.
Sorry!
When I want a crumpet I want it now not at next meal time.
Then I found the baking powder versions and was so excited.
However, I found that many of these sacrificed flavor and many of them tasted like flour paste. That is NOT good eats.
I have found some medium ground though.
I found some recipes that use both yeast and baking powder.
The time is cut down to 15 minutes and the flavor is fabulous.
I have found that those that call for eggs taste the very best.
So.....
Here is my recipe for crumpet, whole wheat crumpets no less.
(white flour can be substituted or mixed half and half with the wheat.)

Miss Lucy's
Whole Wheat Crumpets

4 cups flour
(whole wheat, white, or a mix of both)
3 cups hot water
2 tsp yeast
2 tsp sugar
2 tsp salt
2 Tbsp baking powder
6 eggs
9 Tbsp Non-instant powdered milk (1 cup instant)
2 Tbsp oil or melted butter

In the hot water (not too hot or you will kill the yeast) add the sugar, eggs, oil and yeast. Mix well and set aside.
In a large bowl mix the flour, baking powder, salt and powdered milk.
Add to the water mixture and mix well.
Let the mixture stand for 15 minutes.

Prepare your griddle or large frying pan by heating it on medium for several minutes.
Oil your crumpet rings. I do this by pouring some oil into a small bowl and dipping or rolling the rings in the oil to coat. Set the rings on the hot griddle for a few seconds before adding the batter.
When the time is up, add a scoop of batter to each oiled ring. The rings should be half filled.
Cook at medium heat until the edges start to look "dry" and they have holes in them.

Crumptes 001


Remove the rings with tongs or pliers.
crumpets 002
Flip the crumpets and bake on the other side.
Serve hot with butter and jam.

crumpets 005

Enjoy!
** Hot milk can be substituted for the hot water and powdered milk. (It is winter here now and fresh milk is not as abundant as it is in the summertime. We don't buy milk from sthe store, only the dairy.)

Thursday, January 06, 2011

Sneaker Saver Tip

Yay for a new year. I am hoping to post some more tips and tutorials this year. Here's to hoping.
sneaker saver
Does anyone in your house have a very loved but very stinky pair of old (or new) sneakers? Well someone at my has does or did I should say. One of my kids has had the stinkiest shoes and it doesn't seem to matter what we do they just stink. I have washed them, soaked them, treated them and nothing worked.
Then I found a scribbled note in one of my many folders of random info. It was for a stinky shoe treatment that is all natural. Yay! for my random note taking. So here is the recipe I found:

Sneaker Saver
1 small box baking soda (doesn't really matter what size)
several drops of Eucalyptus Essential oil (I would maybe use 1/2 tsp per pound of soda)

Directions.
Mix the baking soda and essential oil in a bag or container with a lid. Mix well and let it sit for a couple of days. This lets the oil get evenly distributed through the soda. Shake every now and then to make sure it is mixed.
Pour some of the baking soda mix into the bottom of the shoes to cover the bottom. Let it sit for a day or two. Then dump it out and check the shoes. If they don't smell sweet enough for you, do it again. One reluctant pair of shoes I tried it on took two treatments. You will be amazed at how scent free they become.
Enjoy!

Sunday, December 12, 2010

Soap Pot

Makin' Soap October
We have been super busy here making up several batches of new soap. It smells so yummy in the soap room.
To celebrate the holiday season we are offering 2 free bars of soap for every order of 10 or more bars at our Etsy Shop
The sale will run to the end of December 2010 while quantities last.
All our soaps are 4.5 to 5 oz.
Here is the list of scents we have in the shop now. Hurry and get yours while they last. These make great small gift for family and friends and office parties. They fit perfectly into stocking for stocking stuffers.
Scents Available are:
Only Essential Oils:
**********************************
Fragrance Oils:
Lemon Tart
Love Muffin
Peppercorn
Pineapple
Plumeria
Red Clover Tea
Rose Petals
Spiced Fig
Tropical Fun
Welcome Home
Wild Mint and Ivy
*******
Twilight Inspired soaps
And you can always get
just like grandma used to make.
Best stain stick ever!

Thursday, October 28, 2010

Cherry "Cinnamon" Rolls

My fall sewing has ended and my Christmas sewing is just beginning..... But for right now I am free to blog a few tasty things. This is a recipe I experimented with for my friend Tracy. Every now and then we have to have a bun (cinnamon roll) and a cup of tea (rooibos tea), and de-stress and the regroup. I need it as much as she does. (I hope she needs it as bad as I do).
I wanted to try something different the other day and I had seen a Cherry roll at a local tea shop and had to give it a try. I used my regular cinnamon roll dough recipe (whole wheat) and added my own home canned cherry pie filling (recipe to come). It was fabulous! So here is what I did.
Cherry Rolls 002
Cherry Rolls

Dough:
2 Tbsp dry yeast
6 Cup whole wheat flour
2 Tbsp Gluten
2 tsp salt
6 Tbsp (non-instant) dry milk (1 cup instant)
1/2 cup instant potato flakes
2 Tbsp lecithin (optional)
2 cups hot water
1/3 cup honey
1/2 cup butter
2 tbsp lemon juice
2 eggs

Dissolve the yeast in the water. Add the honey, eggs, milk, salt, lemon juice, butter, potato flakes, and lecithin and 1/2 the flour. (mix the gluten with the flour or it will clump). Beat well and let rise. Add the remaining flour and kneed for 8-10 minutes. Let rise for 1 hour.

Filling:
1/3 cup honey
1/4 cup butter
1 can cherry pie filling

Mix honey and butter together.

Roll out the dough into a large rectangle. Spread with honey and butter mixture. Top this with cherry pie filling.
Roll into a "classic cinnamon roll". Cut with dental floss or a heavy thread. Makes 12 very large or 24 small cinnamon rolls. Place on a buttered pan or cookie sheet, cover and let rise for 20 minutes.
Bake at 375 deg F for 18-20 minutes.

Frosting
1/4 cup butter
4 oz cream cheese
2 cups (maybe a bit more) Powdered sugar
vanilla extract
Milk if needed

Mix the butter and cheese together. Add the sugar and vanilla. Whip into frosting. Add more sugar or milk if needed.
Frost the rolls when the come out of the oven, this melts the frosting all over the place and it is gooey, sweet and warm.
Heaven!

Tips and Tricks I have learned:
*non-instant powdered milk is tricky to work with. If you don't mix it in just right, it clumps. I have found that you either need to whisk it in carefully (not something I ever remember) OR mix it with your flour. This spreads it out and there is no clumping. The same goes for the gluten. It clumps something terrible, however, mixed with the flour there is no problem.
*Oven proofing - I have found that if I "proof" or raise my cut rolls in the oven, they get much bigger and fluffier. This is quite an accomplishment with 100% whole wheat. What I do is heat the oven to 200 deg. F and then TURN IT OFF. While that is heating, I boil a kettle of water. When the rolls are cut and in the pan, I our the boiling water into a baking dish in the oven and slip my rolls right in there. I let that set for 20 minutes. I remove the rolls and the water, heat the oven to temperature and bake as usually. The buns get really big. Because of this, I space them well on the pan so they are NOT touching when I put them in, they will be when I pull them out to bake.
Cherry Rolls 001
These rolls are "proofed" and ready to bake.

Wednesday, October 27, 2010

Happy Halloween

Byrdies
This year we have:
Sushi, Sally (nightmare before Christmas), The cleverest Witch, A princess, and Toothless
We had fun, nearly sewed my fingers together. It is so worth it to see them have so much fun designing them.

Monday, October 25, 2010

Yarn Dyetorial

Yarn Dye 009
Isn't that lovely?!
Step two of my Yarn Experiments was to dye the yarn.
So...... Here is a quick tute of what I did for this project.
1.
Tie Dye Totorial - Yarn Dying 003
First I put the yarn into hanks of about 2 oz each (weight).
Then I got them wet with water and squeezed as much out as I could.
2.
Yarn Dye 001
Then I mixed up my dye concentrates (remember I told you how to do this HERE.)
After I mixed the concentrates. I mixed them to the desired colors (just had fun really mixing). I mixed enough to make 1/2 cup of the mixtures. Then I added enough water to that to make 1 cup.
3.
Yarn Dye 006
Then I poured the mixed and diluted dye over the wet hanks of yarn. I put two together at a time so I would have about 4 oz of each color I mixed.
Let that sit for 15-20 minutes.
Then Add 1 cup of prepared Soda Ash Solution (instructions found HERE).
Let this sit for 1 hour to over night.
Then rinse in running water until the water squeezed from the yarn runs clear.
Yarn Dye 013
Line dry for several hours. I did bring some in because it was starting to rain (fall in Missouri is mostly rain or the threat thereof.) I put it in the dryer on "delicate" setting and it dried all right. It got a bit fluffy but that made it feel so soft and wonderful.
Yarn Dye 010
Now to do my project with it!

Tuesday, October 12, 2010

New Projects

With Fall and Winter coming now I am in the mood to start a new project. Not some "I'll be done in ten minutes" kind of project but one that will take me weeks and maybe months. I am pretty excited about this one. Maybe I will even post a tutorial or two along the way and it progresses.
At any rate, I am going to enjoy this and by blogging it, MAYBE, I will be able to keep the ADD factors in check and actually finish it. We will see.
Here is the first picture.


Tie Dye Totorial - Yarn Dying 003


It actually took me all day to put this yarn into hanks. Horrors. I had no idea how long it would take or that it would make the muscles in my arm pit hurt either. :o) Now I have 3 or so shopping bags full of these loopy hanks of yarn, ready for step 2.

Dyetorial - Basic Scrunched Folds

Yay for blogging one a month. I am sorry. I meant to get these out a lot sooner but Fall is turning out to be just as busy if not more so than summer was.
At any rate, here is your first "Hands On" Tie Dye tutorial.
The Quicky Basic Scrunch Fold
scrunch fold 007
This is the fastest and easiest way to "tie dye" a shirt or piece of fabric.
Instructions:
1. Start with a 100% cotton shirt of your choice.
Wash it with sinthrapol (just a cap full) to get any residue off your fabric. I do this with everything I am going to dye to make sure there is NOTHING on the surface of the fabric that will inter fear with the dying process.
Do not dry the shirt, leave in damp.
Plain T Shirt
2. Lay the shirt out flat on a clean work surface.
Scrunch Pleats 1
3. Starting along the bottom edge of the shirt, walk your fingers up the shirt, scrunching it together into random pleats as you go up the shirt.
Scrunch Pleats 2
4. Tie the shirt together. You may also use rubber bands or small zip ties if you like. You just want to tightly secure the shirt in its random pleats and folds.
Scrunch Pleats 3
5. Soak the Shirt in your soda ash solution for about 5 minutes. Squeeze as much of the solution out as you can.
Add Color
6. Place the shirt back on your clean and now plastic covered surface. Apply the dye colors of your choice in what ever order you choose to BOTH sides of your shirt lump.
Be as bold or concervative as you wish with your color combinations. The shirt will look like a real mess. That is the point. Don't be shy about squirting that dye in there. If you don't, you will have lots of white showing in the shrits.
Scrunch pleats 5
Remember that with tie dye, you get what you get. It is always a suprise.
Scrunch Pleats 4
7. Put the drippy dyed shirt bundle in a plastic bag and let it sit for up to 24 hours. I have found that you need to let it set for a minimum of 3 hours. So experiment and see what you like. 24 hours is a safe starting point.
8. Now you will rinse the shirt bundle out in cool running water. This is safe to do outdoors but the dye will stain anything it comes in contact with. It will eventially face so don't worry about permanent dammage to sidewalks and such.
9. Cut the strings and open. Now you will need to wash the shrit with Sinthrapol again to make sure all the excess dye is discharged from the shirt. I wash these in the washing machine with 2-4 Tablespoons of Sythrapol per load.
Dry on the line or in the dryer.
In future washings, take care what you wash the dyed items with. Some excess dye (usually blue and sometimes red) will still discharge for several washings.
I have also used DAWN dish soap in place of the synthrapol with satisfactory results.
scrunch fold 011
Here is the same process with just fabric yardage.
You can use just about any 100% cotton BUT watch out for antying that has permanent press treatments on it, as this will not hold the dye well and will result in pastel colors. This is great if that is what you are going for, however it is a big dissapointment if you were going for Bright vibrant colors.
So there you have it. Your first REAL dyetorial. There are several more folding and dying techniques to come and hopefully I will have the time to post them all over the next few weeks.
Enjoy!

Thursday, September 09, 2010

Dyetorial - Dye Solutions

Now that you have your list of "Ingredients" you need to dye fabric, I need to give you the recipes. I am putting them here so you can have a quick reference and I won't have to list them over and over and over ..... again. :o)

First off I am listing the recommended reading.

Color by Accident: Low-Water Immersion Dyeing by Ann Johnston

This book has taught me a lot about how dye moves through fabric and has helped me develop my own recipes for dye. There are many other dye books out here you can get but this one is a great starting point. It really helps you wrap your head around dye concepts.


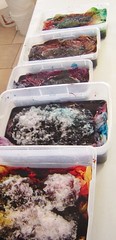
Now for your basic recipes. I start with dye concentrates from which I mix all my colors. Then I add water when I put them in the bottle.


Dye solution:
- this is what you mix your dyes in it is urea water and it helps the dye move through the fabric. You will not have good results if you leave this out.


1 cup water

2 Tbsp Urea

1-2 tsp dye powder (darker colors like black may need more but I have been happy with 2)


Use warm water to dissolve the urea first. ( The urea will lower the water temperature while dissolving.)
Add the dye powder and mix thoroughly (it likes to clump so it requires a lot of stirring to make sure it is all dissolved and not just sticking to the spoon or cup). **Do Not dissolve the dye in water over 95 deg. F. because it will seriously reduce the reactivity (sticking ability to the fibers) of the dye. NOT a good thing.
Makes 1 cup + dye concentrate. For most at home projects (a couple of shirt or yards of fabric) you will need a lot less of each concentrate so adjust the recipe accordingly.

How long will this last?
It is said that it will last up to 1 week at room temperature and longer if refrigerated. I however haven't had much luck with it lasting more than a day or so. I sadly found the colors to be dull after 2 days. So it is better to make less and have to mix up a bit more than to make more and waste it. Sad day!
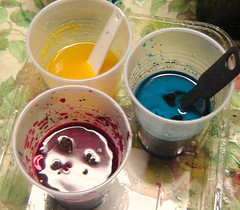
What colors to mix?
I use lemon yellow, fuchsia red, turquoise, and better black. I usually need 2 of the yellow to 1 each of the red and blue. I also use about 1/4 to 1/2 the amount of the black so make a lot less of that.

Now What ?

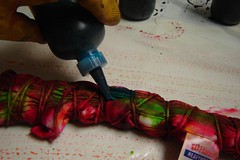
I have given you recipes for concentrates. You are going to want to dilute these. I mix these half and half with water. BUT First! I mix the colors. I mix them right in the squeeze bottle and then add an equal amount of water. (Basically I fill the bottle half full with color and then fill the rest with plain water. )


Mixing Colors
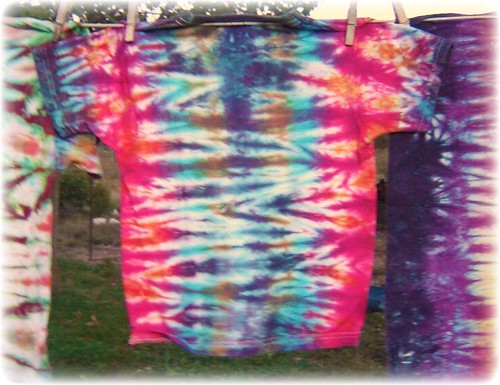
When I am dying I usually the the muse take over and do colors by my mood. However there are some basics that I do.
I love fuchsia and turquoise but sometimes I want a true red and a true blue.
To get this here is what I do.
True Blue = 7 parts turquoise and 1 part fuchsia
True Red = 7 parts fuchsia and 1 part yellow

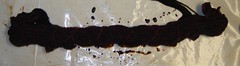
Now for the other colors - well I wing them, but here is what I have found. I swirl what I am mixing in the bottle (before I add the extra water) and try a drop on a white paper towel (the really fluffy ones work best) and see if I like what it does.
Orange - mostly yellow with a bit of fuchsia. I swirl the bottle and will test a drop to see if I like it
Vermilion - more like 3/4 yellow to 1/4 fuchsia maybe a bit more
lime green - mostly yellow and a little bit of turquoise till you like it
grass green - mostly yellow with a bit more turquoise
Purple - about 3/4 turquoise and 1/4 fuchsia but test it and see what you like
Wine - about 3/4 fuchsia and about 1/4 turquoise and test
Golden yellow - almost all lemon yellow with a few drops of fuchsia - this is a warmer yellow
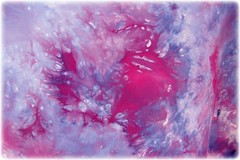
Pink - mostly water (might want to use plain urea water here) and a few drops to 1 tsp fuchsia or your true red
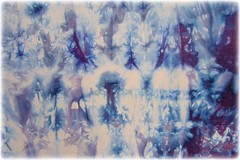
Light Blue - same as for pink but use the turquoise or true blue

The Magic of ADDING BLACK
-adding black to any color you make turns it into a jewel tone. It is lovely to see what it does.
Add it to your:
- reds and you have wine, Burgundy, and maroons
-Blues and you get peacock, teal, and such - gorgeous colors
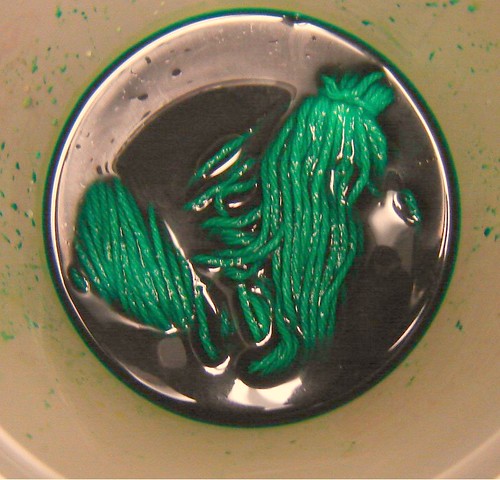
-Greens and you get emeralds and some mosses

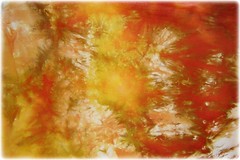
Moss and Earthy Greens - experiment here but adding golden yellow instead of lemon yellow makes more mossy, earthy greens. So.... try adding a drop or two a few of red to your greens. The results are really gorgeous.

Browns -- These are hard to predict. I just mess with oranges and blues or greens and reds to get a color I like. I have ordered brown dye right from dharma trading co. and loved them. I have tried chocolate brown and golden brown and love the fun of them both when mixed with other colors like yellows, oranges, reds and even greens.

Dye Fixer
I almost forgot but this is just as important as the rest.
9 Tbsp Soda Ash
1 gallon water

Mix the soda ash in hot water till dissolved. This is used either before or after the dye is applied to your fabric. Without this chemical your dye WON'T work. In the tutorials to come, I will tell you how to use this solution for each project.
This will keep for a very long time. In fact, I have never had it go bad.

Wednesday, September 08, 2010

Dyetorial - Tye Dye Tutorials

I love to Dye fabric, shirts, what ever. I would like to start sharing some of these techniques I have used over the last 20 years of dye sessions I have had with my family and friends.

Dyetorials

Supplies:

I get my dye supplies from Dharma Trading Co. I trust them and have been getting my shirts, fabrics, dyes, and dye chemicals from them for well over 20 years. They are easy to work with and prompt in their shipping. They also have lots of helpful ideas.
If you have never dyed before I suggest you get yourself a starter kit, here. It has everything you need to get started and has step by step instructions for mixing and using your dyes. It is a very thorough and affordable way to get started.

What I use:
My favorite dye colors are
Procion Fiber Reactive Dyes
I recommend starting with the 4 basic colors. These are the pure colors from which all other colors are mixed.
They are:
Lemon Yellow
Fuchsia Red
Turquoise
Better Black
Later I will post a chart for mixing that I use and maybe it will help you too.

Chemicals you need:
Urea - makes water wetter so it goes into the fabric better and takes the dye with it.
Soda Ash - Dye Fixer - kills the dye and permanently bonds the color to the fibers of the fabric
Synthrapol - Dye suspender (?) It catches the used dye and gets it out of the wash when washing out the dyed shirts - this comes with a heave duty warning so please read before choosing to buy - I have used Dawn dish soap in a pinch and it works too but results may vary.

Equipment:
Mixing cups, spoons, etc...
Squirt bottles - I have found these to be a must and these here last for years
Top loading washing machine - front loaders don't have enough water - if you don't have one, find a friend that does and will let you use it, Make them a Shirt in return. :o)
Plastic sheeting to cover you work surface
GLOVES - A must for your hands. This stuff is messy and makes explanations in public less awkward.
Dust mask - a must when mixing the dye - you don't want that stuff up your nose, it isn't toxic but exposure can make you allergic and hey that would be tragic! No dye would make me a very sad girl and maybe you too.

Well I have to run off to Girl's Day out. I will start posting Dytorials tomorrow!

Tuesday, September 07, 2010

Meet Mortimer

I have a little turtle.... um I mean tortoise*.....

Tortoise 015

I NEEDED to make a tortoise the other day and so I did.
My little boy took off with him and named him Thomas. Thomas is his new snugly buddy at bed time and his run through the muck friend during the day. (Shout Hurray for Totally Washable toys!)

Then I had to make a smaller one. I wanted one to have in my sewing room. I NEEDED my own.
Tortoise 028
Meet Mortimer. He is a very quiet little friend and just the right size to sit on my self.
I couldn't then just make one so I made a couple of each and had some fun in the yard with them.

Tortoise 021
First Thomas found a friend. Her name is Tiffany.
Now.....
Tortoise 025
Mortimer now has a sister named Matilda.

Tortoise 033 C
We have a whole little Tortoise family.

Tortoise 035
And they are off on the own grand adventures... maybe to meet the Hare family.

You can make Mortimer and his whole family yourself.
The new PDF pattern is available at my Etsy Shop.

Tortoise 025
Related Posts Plugin for WordPress, Blogger...