


Pattern pieces - Cut these out of paper if you need that or use a rotary cutter, cutting mat, and quilting ruler to measure the fabric itself.
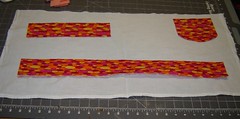
Body of Apron - measure around your chest just under your armpits and add half again to that number for the width of your smock skirt. (For example a 36" bust + 18 = 54") The length of the top is however long you want it. You could take this to the floor if you want. I wanted mine to come just past my hips so I made mine 18"
For Hannah's smock I wanted to use one of those embroidered dishtowels so found one wide enough to go around her with room to spare and cut it in half to make one for her and one for another lucky little girl. (not sure who yet)
Contrasting band at the top of the apron - Measure around your bust again and add about 2-4 inches. Test this measurement on you and make sure it isn't too snug or too loose. I made mine loose and I like that but Hannah's is a bit snug and it won't fit her long unless I make an alteration ( I have a plan and if I get a snap press I will let you know what that is). This strip needs to be 3 1/2 inches wide (for example 36" bust + 4"= 40" x 3 1/2"). You need to cut out 2 of these one of which is your facing. You can line this with interfacing you choose but I didn't I really hate working with that stuff and never remember to have any on hand or can't find it when I need it.
Shoulder Straps - Find a comfortable length from your front to your back over your shoulder. This is easier to measure on someone else than yourself. My straps are too big and keep flopping of my shoulder but Hannah's fit perfectly. I will have to take mine in. They drive me nuts. A good average length is 14" and the straps need to be cut at 4 1/5". You need 2 of these.
Pocket - This is optional. Cut out two squares the size you want (4x6"). Place them together and curve to bottom if you like or leave it straight. It's your pocket, do what you like. :o)
Sewing order:
Shoulder straps - Fold the fabric in half with right sides together and sew each strap with a 1/4" seam.
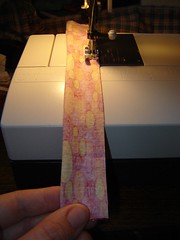
Turn the straps to the outside and press them as you like. The seam can go to one side or you and slip it to the back if you want to be fancy. It is your strap, do as you like. :o)
Contrasting band - For the piece that will be on the inside, fold the bottom edge under ( to the wrong side) 1/4". I just eyeball that. (I really hate fussy measurements).
Now you need to pin your straps in place. To do this I folded the outside band in half and marked that then I measured out about 3 to 5 inches and placed the strap end on each side of the front. (I know this sounds confusing but if you will place it out in fornt of you, I promise it will make sense.) Next do the same from the middle back of the the band (this is where it will close in back and overlap) measure back on each side about 3-5 inches and pin the other end of each strap on each side. MAKE SURE you are pinning them to the top of your band so that your straps go over your shoulders and not under your boobs. :o) For better instructions go here. She has a tutorial for a smock shirt and has descent drawings. They helped me get the idea.
Now that you have your straps pinned in place, place your lining fabric on top, right sides together and stitch all the way around, encasing the straps inside with 1/4" seams.
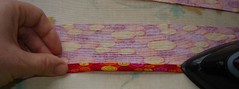
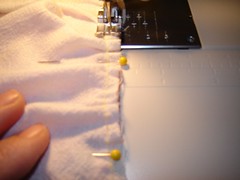
Now for your skirt. Because I used a dishtowel for Hannah's smock I didn't need to finish the edges but if you use yardage then you will want to make a narrow hem on the sides and bottom of your piece. At the top you need to make a gathering seam by sewing the whole length with the widest stitch your machine will make near the edge of your fabric. Once will do, however, twice is more stable. (this is one way of doing things, you can also make tucks or pleats all the way across, it's your apron, do as you wish). Now pin this to the bottom of the front piece of your contrasting band. When I did this I didn't go right to the ends and left about and inch or so of band on each end for putting buttons or snaps or whatever there. Now sew that with a 1/4" seam.
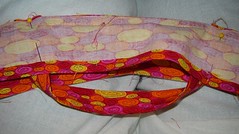
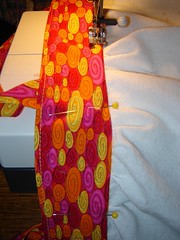
Now tuck the seams to the inside of the band and pin the front and back together with wrong sides together and top stitch around the whole thing to finish off the lining seam ( this is why you folded the lining side up 1/4 inch). You could stitch this by hand but who has time for that. :o) This works for me. You can see in the photo here the inside of the apron.
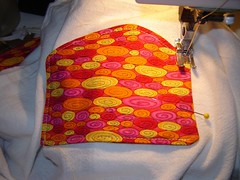
Pocket - Take your two pieces of pocket fabric and place them together with right sides facing and sew them all the way around the outside edge, leaving and opening for turning. Use a 1/4" seam.

Turn to the outside and press. You can whip stitch the open shut but I just made sure my opening was on the side and took care of it when I top stitched the sides and bottom of the pocket to sew it in place. So now top stitch the top of the pocket and place the pocket where you want it and pin it in place. Top stitch around the sides and bottom.
Now you are done! This is actually the one that I am going to give away I like it BUT....
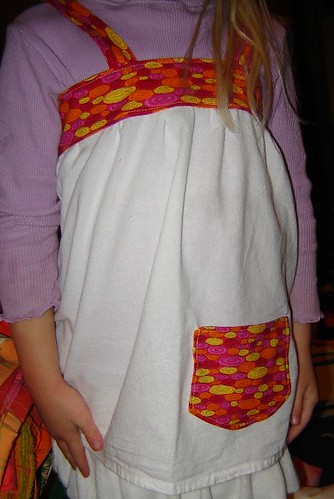
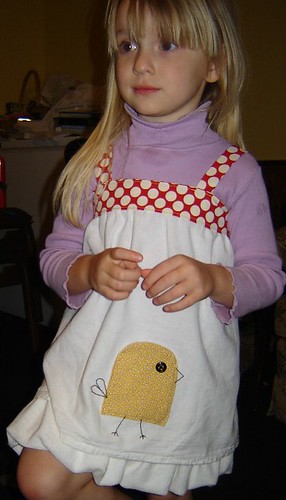
I really like this one better that I made for my Hannah baby Chicky.
I hope this wasn't too confusing. I may come in and fix this all. I don't do well with directions. I promise I will do better next month. Maybe if I write it on paper as I go. Who knows. You will just have to wait until Feb. to get the next one. I have several in mind and will just have to choose one.


9 comments:
OH!!! These are too cute! I am going to have to make one (or two) for Missi! I have such a thing for aprons also! I just talked my mom into making apron for us girls each Christmas! They are not as fancy as Grandma made, but oh they are fabulous! I say the more vintage the better!! But how do you store your aprons? Do you hang them? A drawer? I only have 5, but I plan on having WAY too many some day! But I will have to catch up on some projects and join you on this "Challenge" next month! FABULOUS!!!
I am a sucker for aprons. I am glad to hear that Kathie is carrying on that tradition. I really want to talk Grandma into doing it again if just once more. Sarah and Caroline are dieing to design it. They are leaning toward Valentines. We shall see. :o)
I am cuckoo over aprons too! I just started making them a couple of weeks ago to add to my online store. I have one my Grandmother made that is just hideous in print but I love it and wear it all the time. I just purchase fabric remnants from the remnant bin @ Walmart for my newest addiction,lol.
Thanks for sharing your tutorial with the fabric coop too.(that's how I found you!) If you'd like to see a pic of the little girl apron I made, you can visit my blog: http://www.homesteadblogger.com/jo yfulmommy You may have to scroll to find it.
Too confusing? No, not at all, it's just a brilliant, detailed tutorial. Thank you so much, I've been wanting to tackle an apron for my 4 year old for months and months, but haven't had the nerve. This, I think I can do! And yours just look marvelous. Can't wait to see what else you come up with, month after month.
Lucy,
I've been cecking out all your aprons. I think you do a wonderful job with instructions! I made a smock similar to this last spring, mine isn't open in the back so I can wear it as a top. I want to make more to wear this summer.
I also plan to use your instructions to make my neices heart aprons. Thanks!!
Thanks for posting this pattern. I made it and gave it away today to my friend for her birthday. You can see it on my blog post for July 2, 2008. Thanks again!!!
Adorably cute! I wish you had a pic of the back, too.
I wonder if it needs to be tied at the back...
I wonder if it needs to be tied at the back
Post a Comment