


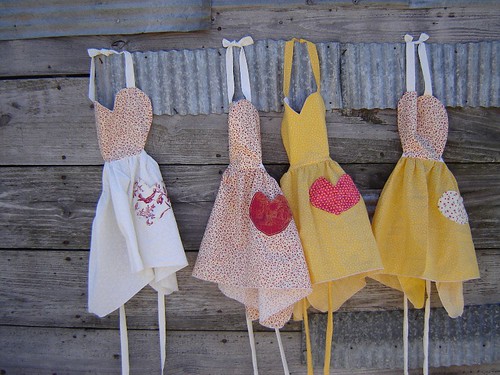
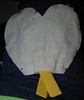
I finally have to photos of the February Apron ready to be posted. This apron was pretty easy to make but I had some learning to do.
First off, I thought I would be smart and cut out all the aprons I was going to make all at once. Well that was a mistake! As a result, the mistake I made was multiplied by 4, instead of lesson learned and mistake corrected. I never learn! too ADD. :o) As you can see there are extras this time. One went to my grand-niece, the lovely Miss Ana. The rest are for sale here.
This apron was a lot of fun in spite of my mistake. What I did wrong was guessing on the size and thinking that it would fit all 3 of my girls. Instead they all fit Hannah. Like she needs that many aprons. This is the second time I have made this mistake and Sarah and Caroline are getting a little impatient for an apron that actually fits them and isn't all about princess Hannah. :o) Sisters!
To get started you need to assemble your tools.

Fabric Cuts: (I am giving the measurements for children you can size them up to fit an adult. I am just not posting both as the child apron worked so much better for me.)
For the skirt: cut a rectangle the size you want - I used the width of the fabric (from salvage to salvage) and then cut it 13 inches long for my little girls.
For the ties and strings: cut 2 - 2 1/2" strips the width of the fabric (2 1/2 x 44")
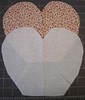
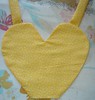
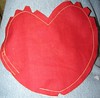
For the bib: cut out a paper heart that fits your chest (remember to keep seam allowance in mind and make the heart slightly bigger. Fold the bottom edge of the heart (the point) up about 2 inches or so. This will fit into the waist band and there is not need to cut it out of your fabric.

Place the heart onto your fabric and cut 2 out (these can both be of your print or you can have one out of muslin)
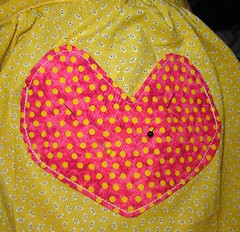
For the pocket: Cut out 1 heart the size you want for the pocket. This should be in a contrasting color.
Sewing instructions: (seam allowances are about 1/4")
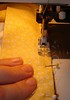
1. Make the neck ties. Take 1 of your 2 1/2" strips and cut it in half. Take one of these pieces and cut it in half again. This gives you 2 - 2 1/2" by 11" or so strips. Fold these in half lengthwise and sew along one and and down the side. Turn them and press.
2. Attach the neck ties to the heart. Take your 2 ties and position them on the top of the heart where they look good to you and pin in place.
Now place the lining heart on top and pin in place. Sew around the sides of the heart.
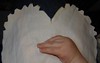
Clip the curves and turn and press.
3. Find a good helper.
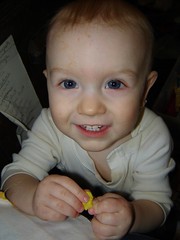
This isn't necessary but nice to have! I couldn't resist this happy face. He came in and "helped" me sew this part.
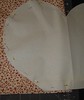
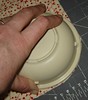
4. Make the skirt. Take your skirt piece and remove the salvages. (why? Because as they are washed and dried the shrink up more than the rest of your fabric and will make things pucker over time. Not pretty.) I curved the edges of the apron to make it easier to sew. To do this, place a bowl on the corners and cut around it.
Now finish off the edges of your skirt. You can do this several ways. My original idea (and the reason I cut the curved corners) was to put bias tape trim all the way around. However, I couldn't find the bag of 100+ tape trims I have. (you don't want to see my sewing room!!) Sooo. I went to option 2 which is to turn and fold and top stitch down. This works much better if you didn't already curve the seam. Yes my curve looks crappy. So on the second one I made I did a rolled hem edge on the serger. It looks much better.
Now you need to put a gathering stitch along the top edge of the skirt. Do this with 1 or 2 rows of wide stitches. I like 2 because it is more stable.
5. Now get your strings ready. Take the remaining 2 1/2" x 44" strip and cut it in half. This leaves you with 3 - 2 1/2" by 22" strips. Sew these together into a long string. I know this sounds crazy but trust me it works this way.
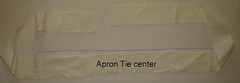
What this does for you is defines your waistband on a child's apron. On an adults apron you would do it similarly but you need much longer string pieces. You do the math for that. :o)
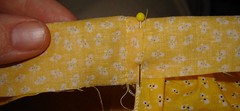
6. Attach the bib and skirt to the strings. Find the center of your string, skirt and bib. Mark it with a pin.
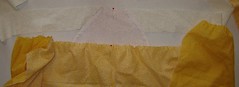
Layer them together. First the string, right side up. Then the heart, right side up and last the skirt right side down. (FYI- the heart is upside down in my picture here. I fixed it but forgot to take a new picture. Sorry)
Now adjust the gather of the skirt to fit inside the waistband section of your apron strings. Pin the layers in place.
Now sew these in place. You might want to increase your seam allowance unless you like picking out your gathering stitch. I am too lazy so I widen my allowance here.
6. Now you need to sew up the strings. I didn't get good photos of this but think you can figure it out. Take each string and fold it in half lengthwise. You will sew this up starting at the end of each string and going down the sides. Stop when you reach the skirt and back stitch.
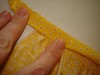
Here I have folded the string and pinned it where the tie meets the skirt to remind me not to sew past this point.
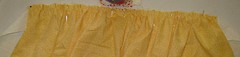
Turn and press your strings.This is what your apron should look like now.
7. Top stitch waistband to finish. Now fold the back of the waistband under and pin in place.
Now you can whip stitch this in place or if you are too lazy like me, you can turn it to the front now and top stitch the waistband. You will fold the heart part up now and stitch right across it.
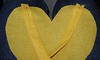
8. Make and place the pocket. Take the heart pocket you cut out and place it on a square of muslin. Stitch around the heart leaving a space for turning.
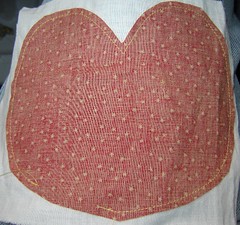
Trim the heart and clip the curves.
Turn and press. Top stitch around the heart.
Place the heart onto the apron where you want it and pin in place. Stitch around the heart leaving the top open.
YOU ARE DONE!!!
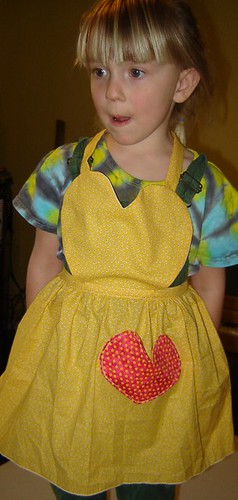
She is a doll! :o)


9 comments:
wow, just wanted to say thanks for the apron lesson. You have a lovely blog! I saw this listed on the co-op and couldn't resist to come over. I am going to try this one next month when I have a little free time. I also love that your kids cook dinner on friday!
thanks for sharing.
I love the apron! It is so cute *dd is too* Thanks for sharing. I love aprons, they are so much fun! My goal this year is to make one for each my daughters and one for each of the ladies in my immediate family. BTW, you will really love your snap press. I enjoy mine and use it almost daily making diapers.
Again, I am envious of your aprons! AND you crafting priorities! I know you have a lot of projects planned and in the works, and it's nice to see projects completed! That's the part I need to work on! I love your pattern I might just make one for Missi.
Ana lucked out and got one of these aprons. She put it on yesterday morning to help me make easy candy. She wore it about half the day (a small miracle considering that she loves to be naked and will even pretend to be Gollum--the scariest thing she knows-- so that she can go around not dressed) Every time I looked at her, she looked so pretty in her apron that I just felt happy. It was so cool. She looked like a princess and I felt like a good Mom!! I was just overwhelmed by what a difference a little thing like a pretty apron made in the happiness of our house.
Thanks Rebecca! I can't wait to see the difference the March Apron makes. Hee Hee
hey this a a really cool apron!
I'm making this one out of a cute bee print. Thanks for posting this sweet tutorial. I love your site and plan to spend some time with your fun ideas.
thank you for the step by step tutorial. i just finished an apron like this for a 5-year old girl. i so happy how it turned out, i'm still learning how to sew.
you can see my apron here:
http://bojana.posterous.com/apron
thanks again,
bojana
what a lovely apron as for kids aprons...the design really fits on her...she really looks like a doll!
Post a Comment